Hi There! For this post I thought I'd share a little trick to emulate a very simple visual "power up" effect. There are many ways to achieve this effect, but this post is mostly about using existing art and assets in a somewhat creative way due to time/effort constraints. To start with, here's what it looks like:
In the video above a white emissive surface is shown "moving" from one side of the solar panel array to the other. Let's take a look at what existing assets we have to work with to achieve this effect.
Texture and Materials
For most of the game we use several 2048x2048 texture atlases with several different maps. This choice was made early on to reduce the draw call count. But for the purposes of this post, we only need to look at one material and two of the textures: albedo and emissive:

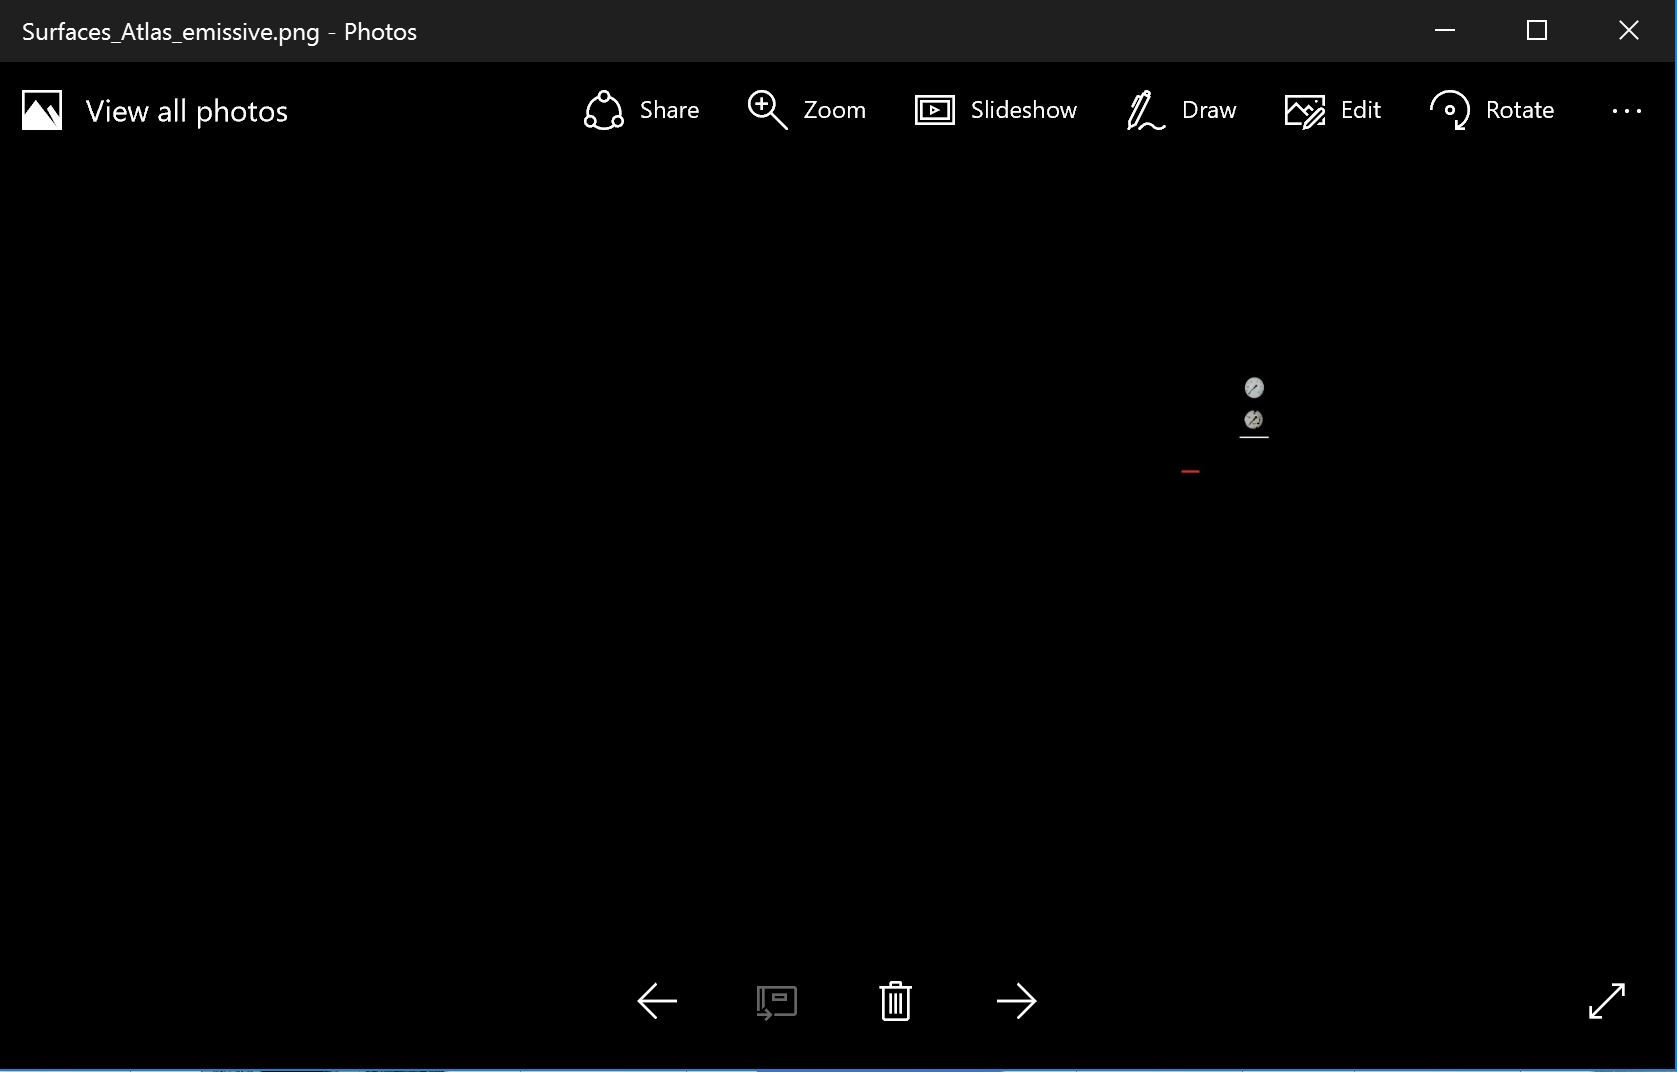
As you can see above, there isn't a whole lot of emissiveness in the texture. But a few pixels are more than enough for our purposes. In fact, most of the white and red emissive materials in the game are made from just those few pixels. An example is this scene with the bright white sections behind the three dark panels on the left side of the image:

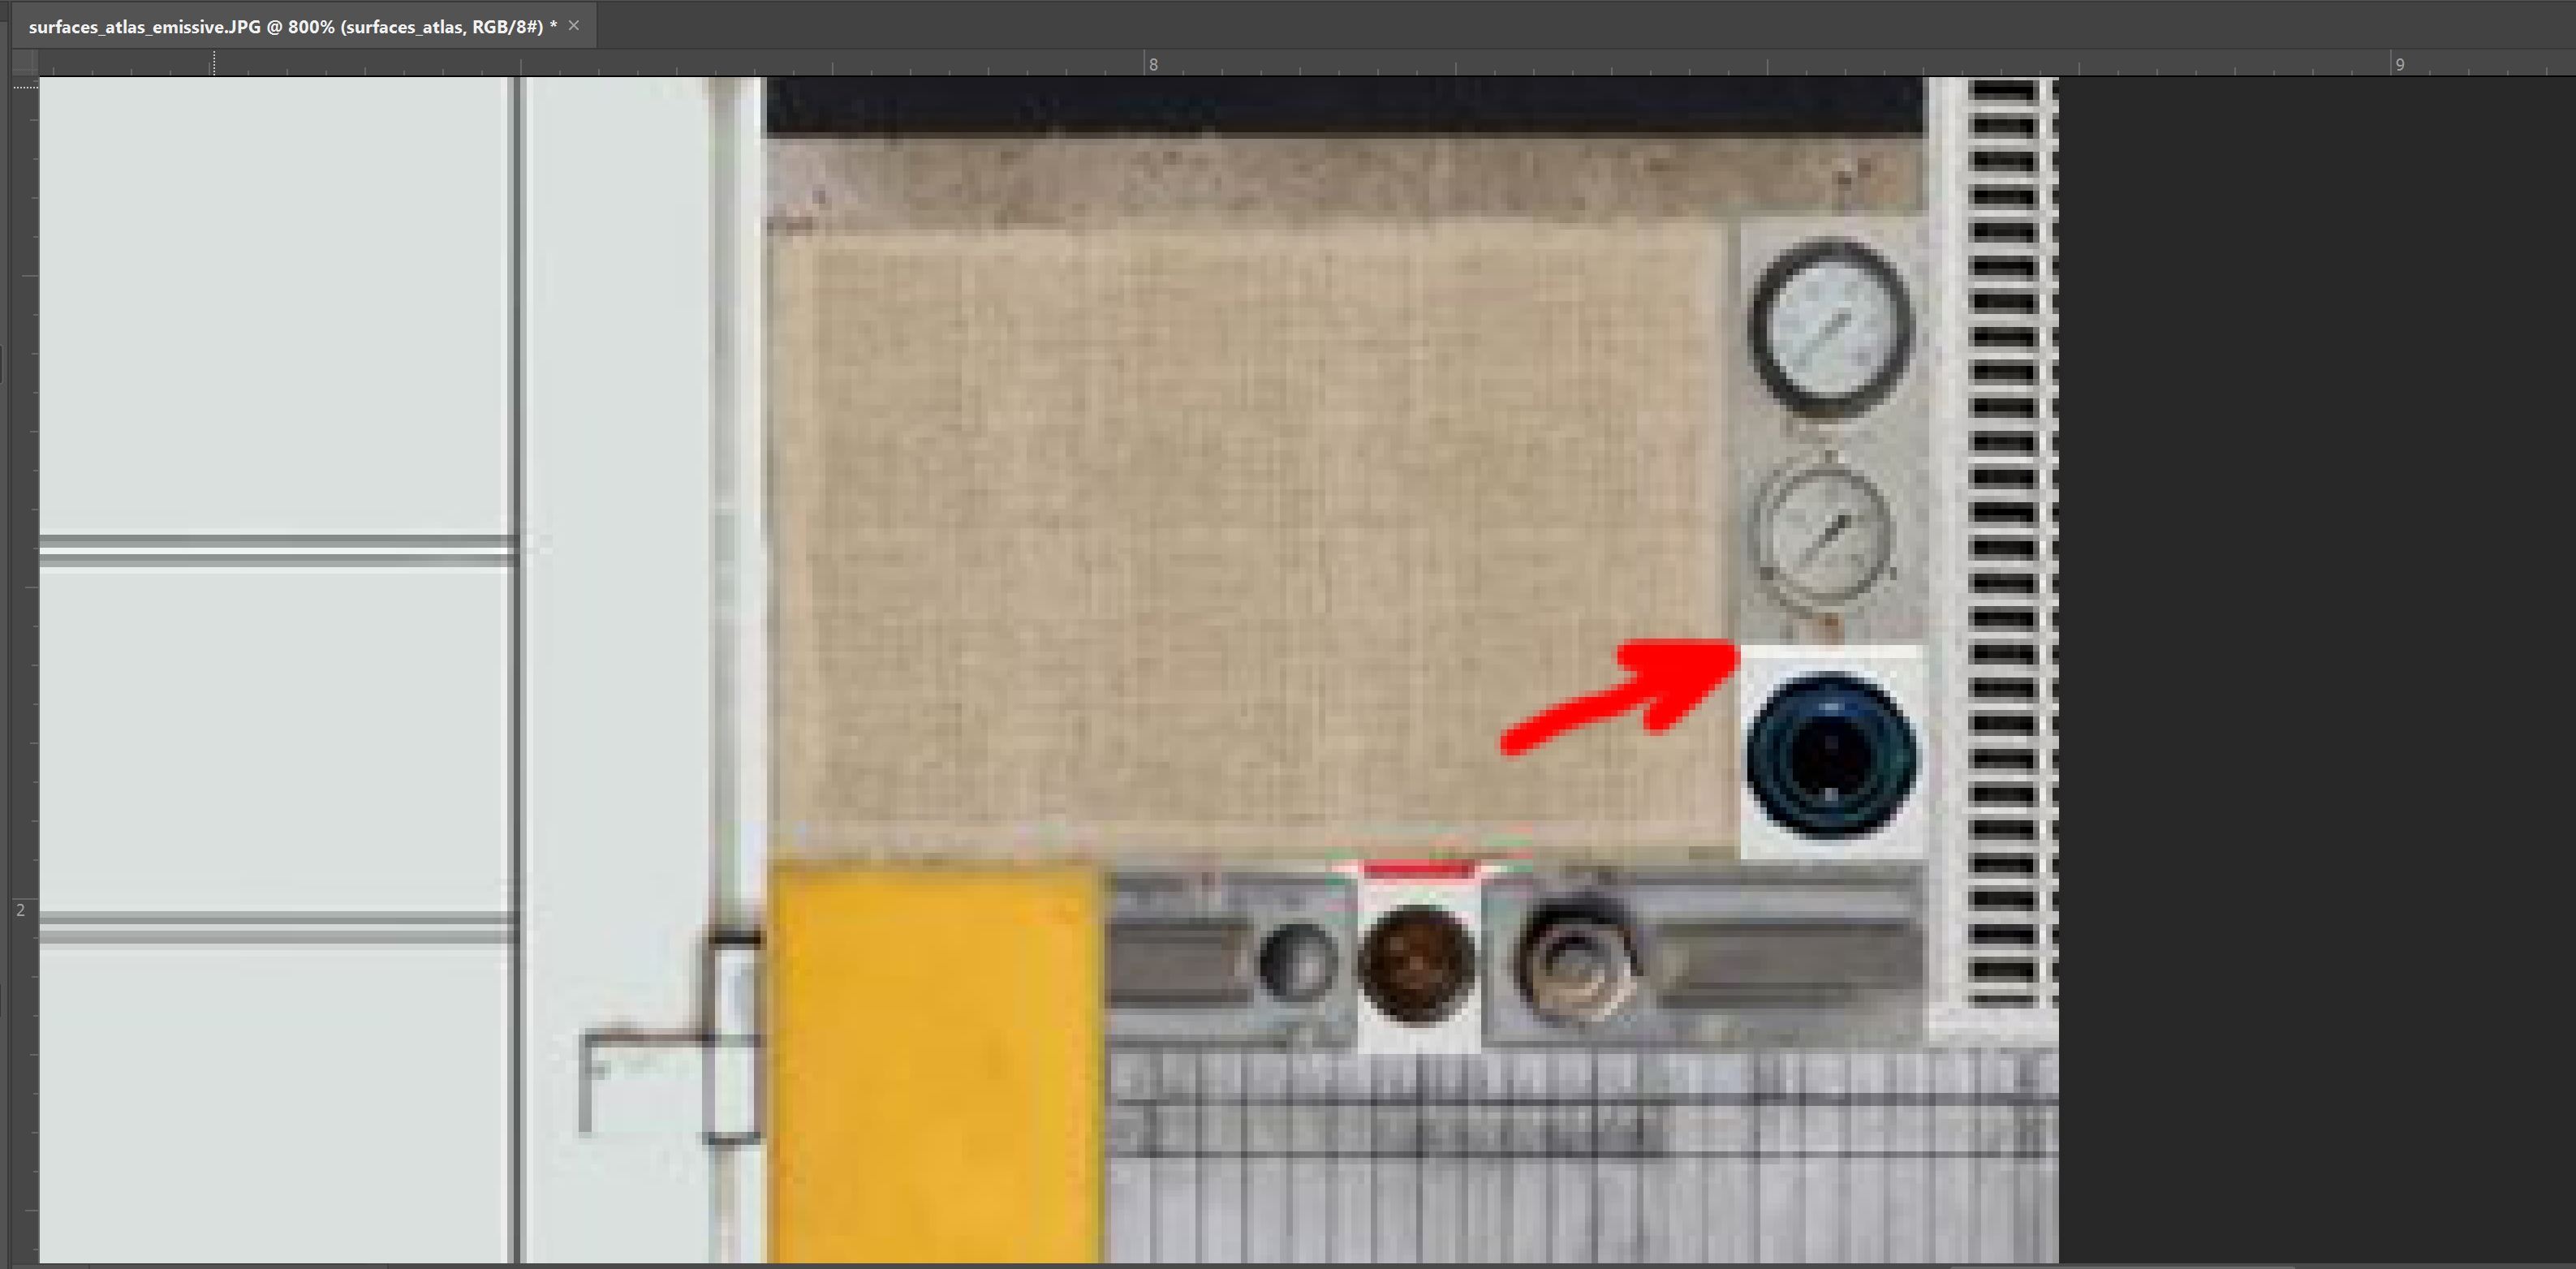
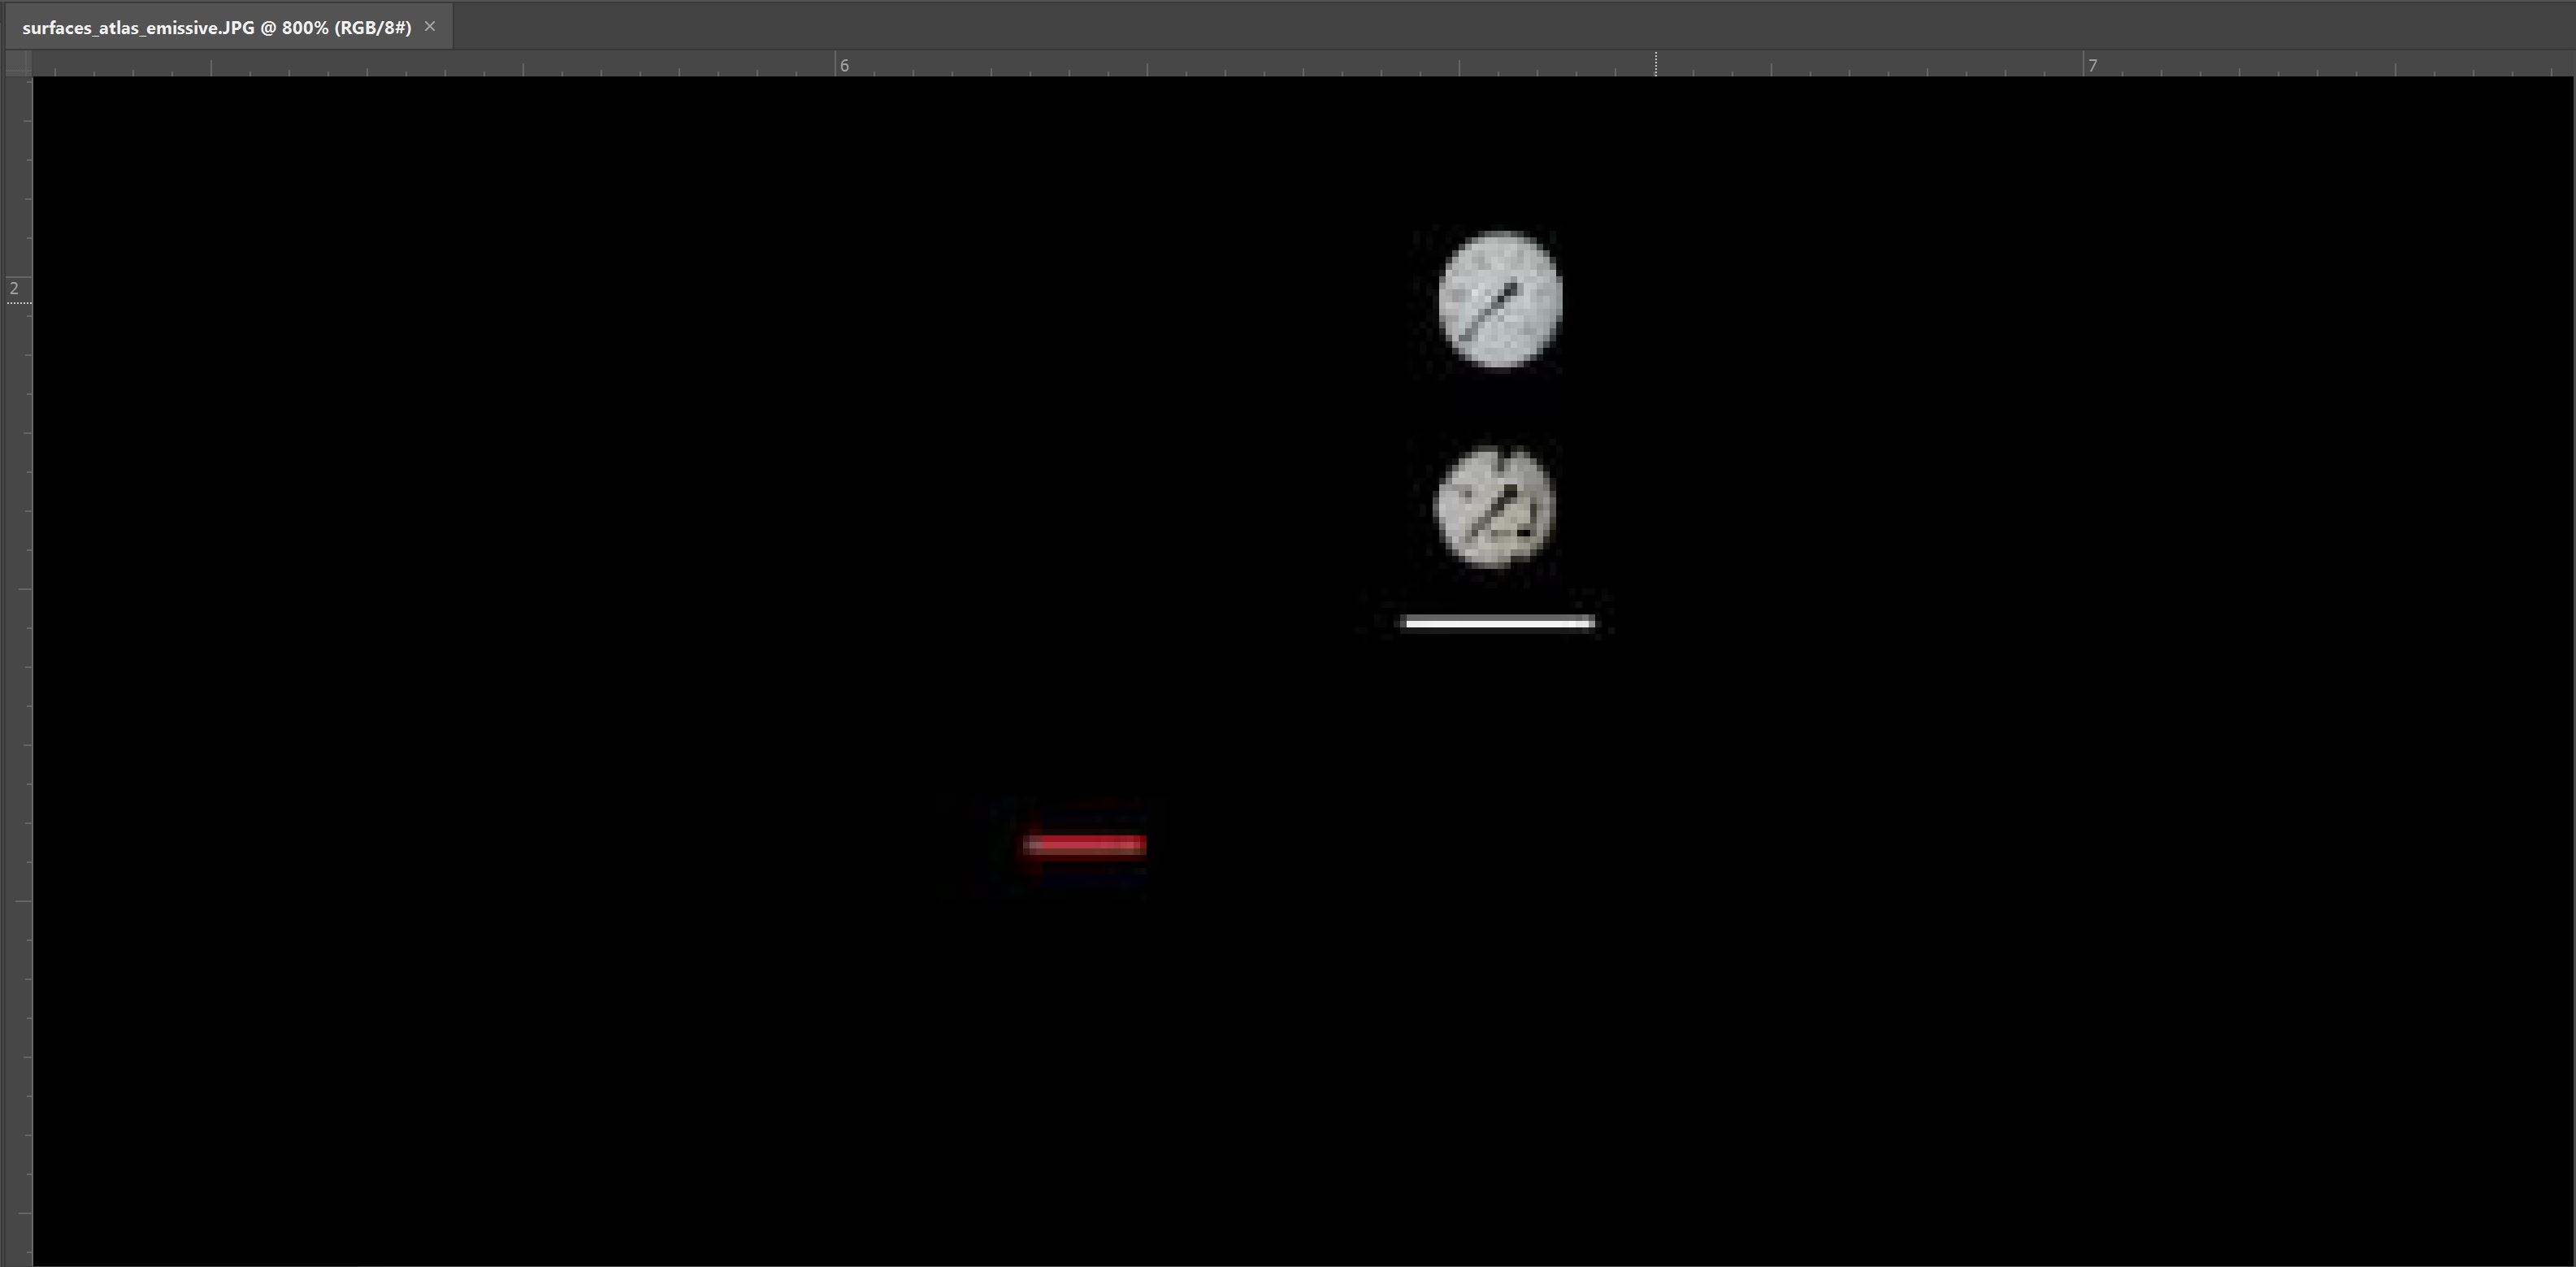
Back to our effect - let's zoom in on the albedo and emissive textures to see exactly what part of the textures we're concerned with. I've marked the albedo texture with a red arrow showing what part of the texture is actually emissive:
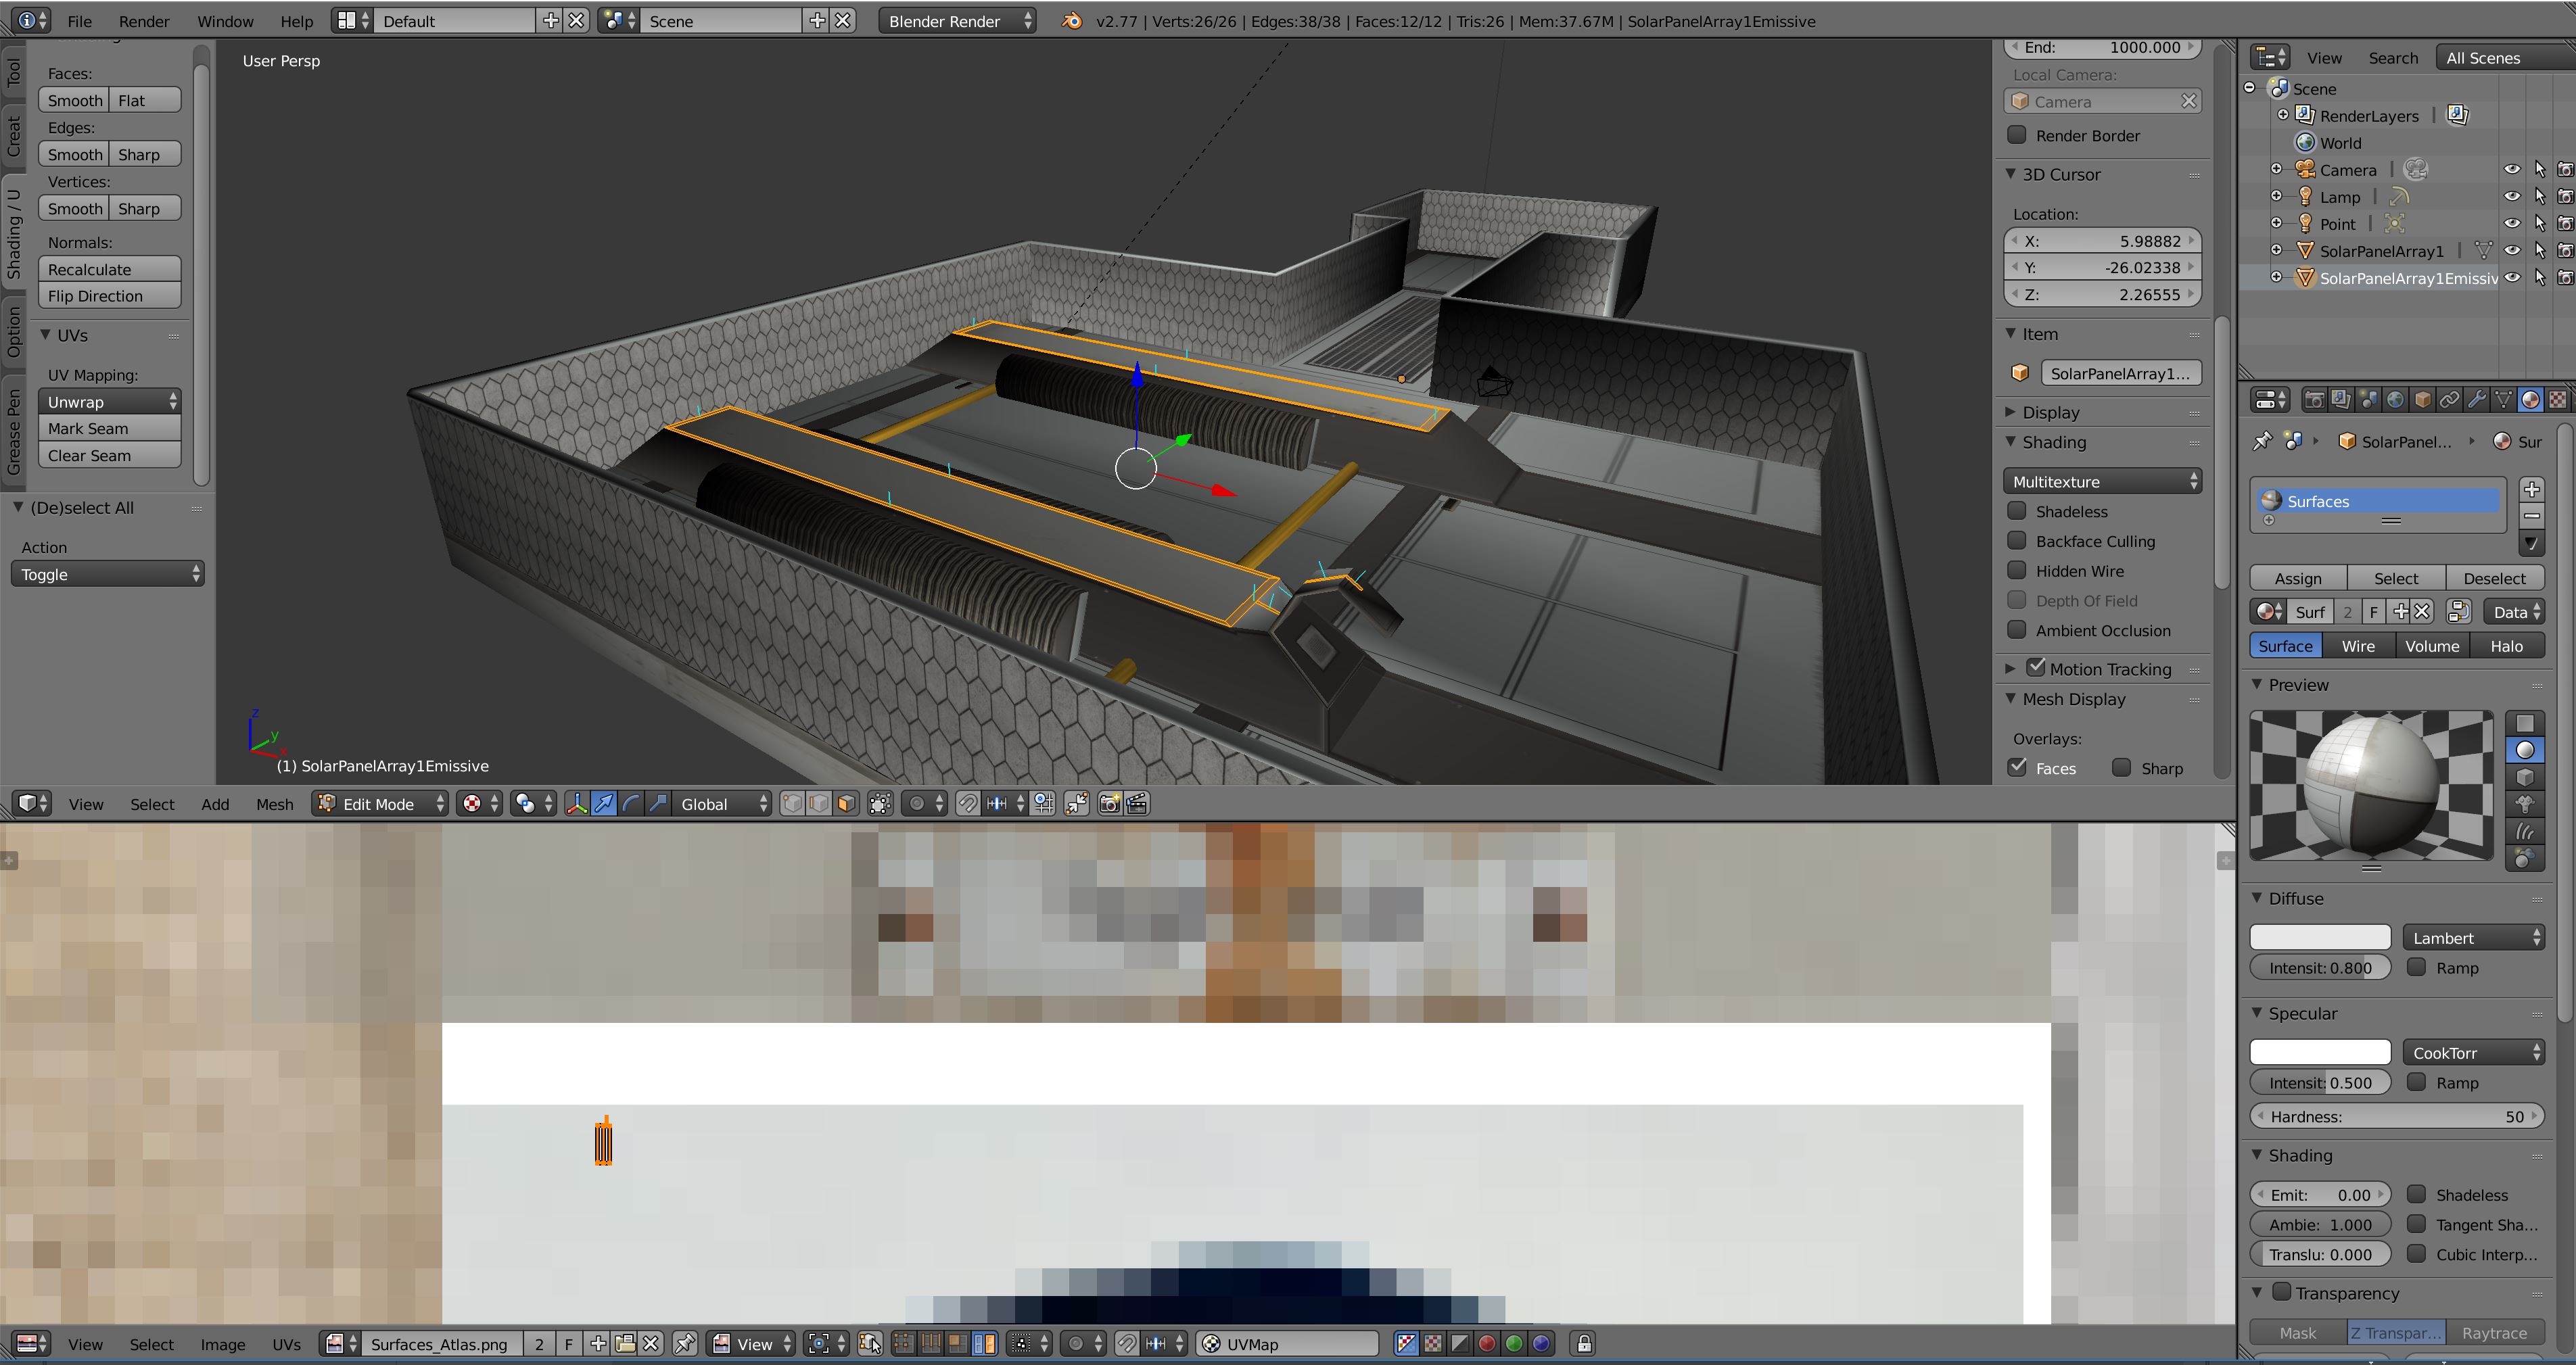
Model and UV Map
Now that we know where we can quickly find an emissive section of the texture, we need to figure out how we can progressively show a surface going from non-emissive to emissive - almost like it's moving. For that we need to look at the model and UV map for the solar panel array.
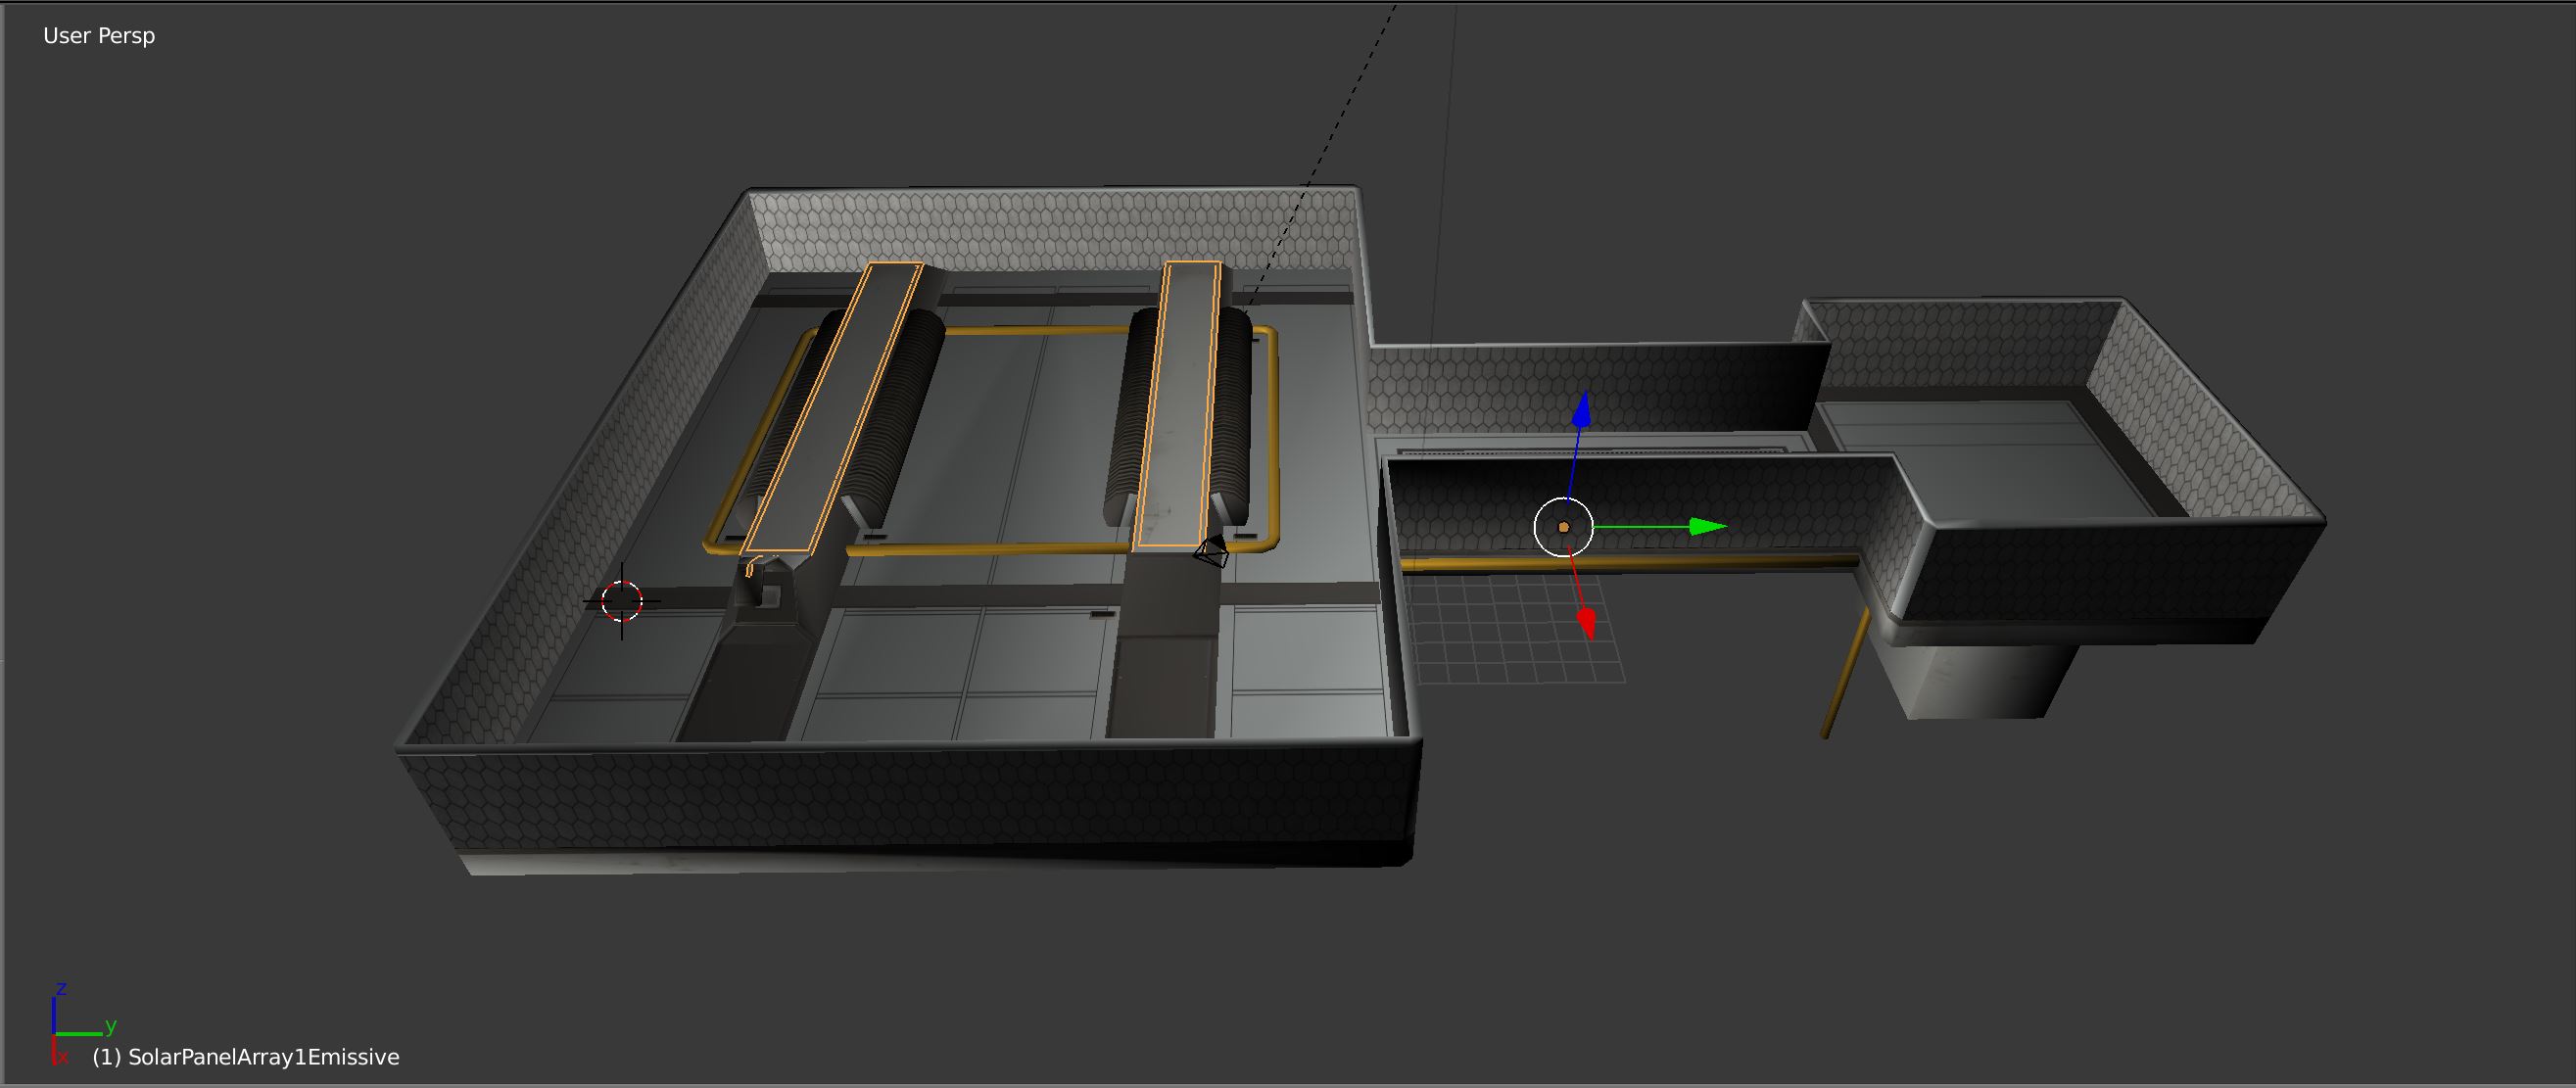
So what we first need to do is make sure the emissive part of the model is its own object in blender. This will introduce an extra draw call in Unity as it will end up being an "instanced material" - meaning an extra draw call will be added. But we think it's worth it.
Finally we can unwrap that section of the model, shrink the UV down to something pretty tiny. We need to place those UV coordinates just below the emissive part of the texture, like so:
As you might have guessed, all we have to figure out in Unity is how can we "move the UV coordinates" up so that it looks like more and more of the UV unwrapped section consists of the emissive part of the texture and stop it there, like so:
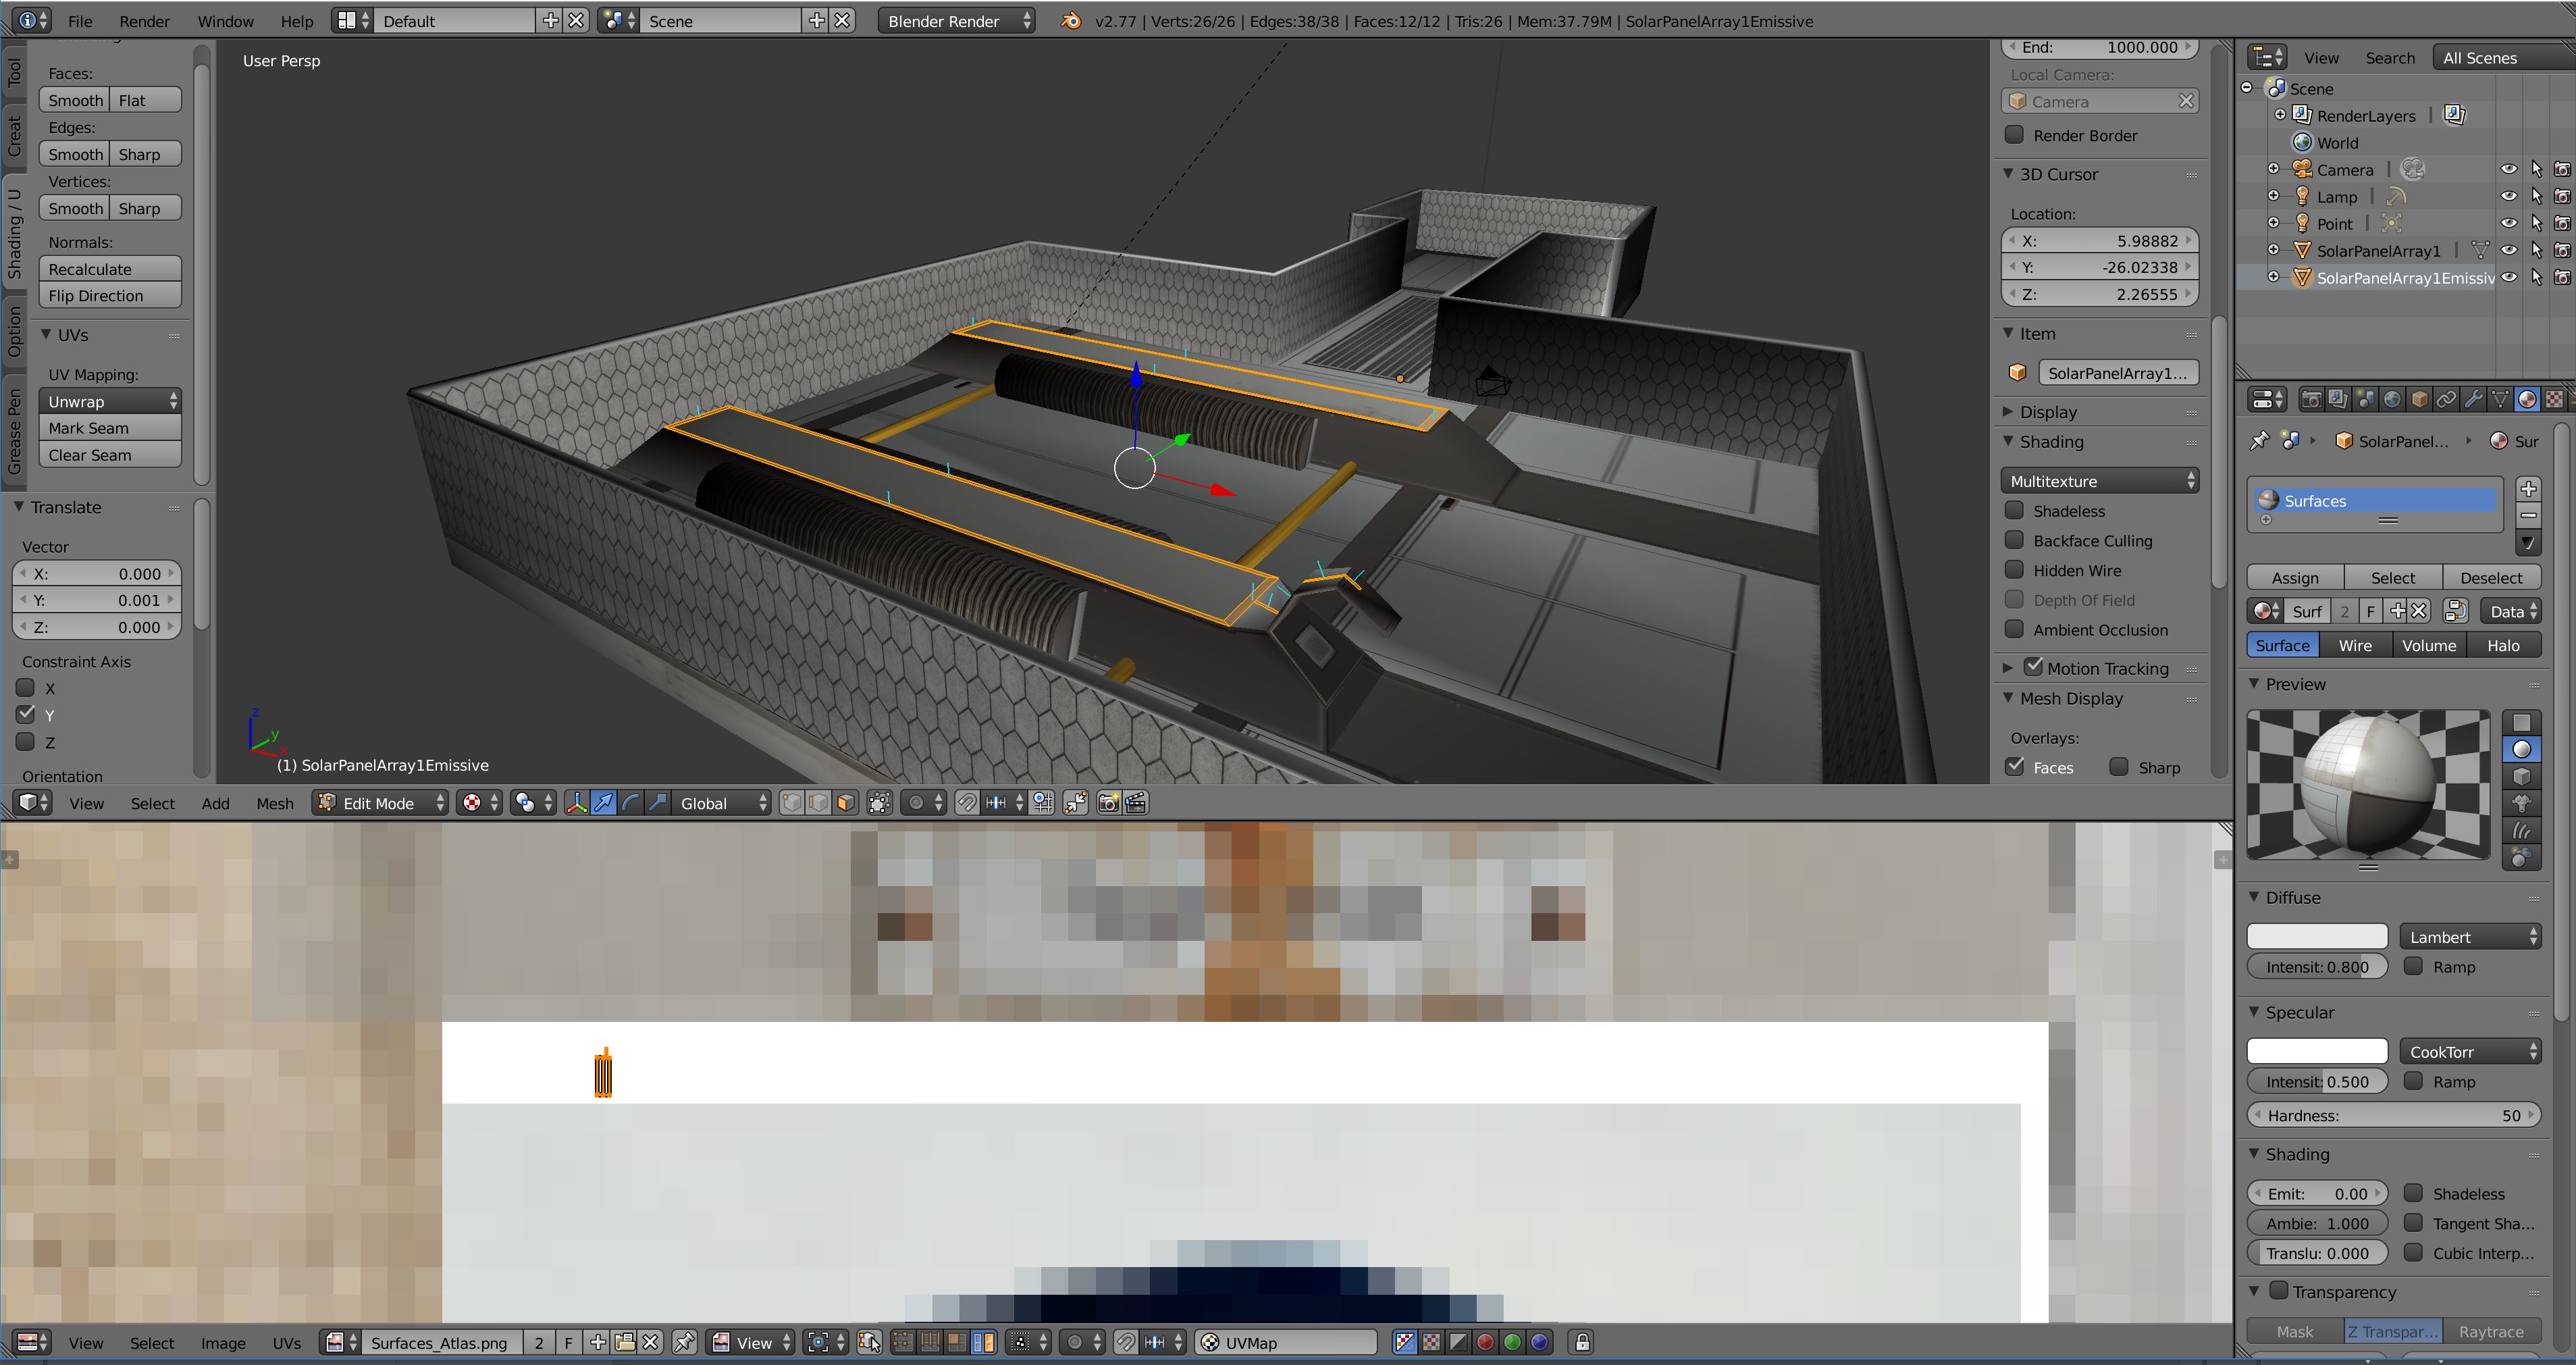
Something to note here is that because of the look and style we're going for in the game, we don't really need to unwrap the power-up/emissive part the solar panel model with the highest fidelity. Also it just so happens that the emissive part of the texture lies right above a half decent "sci-fi surface looking" non-emissive part.
Texture Offset in Unity
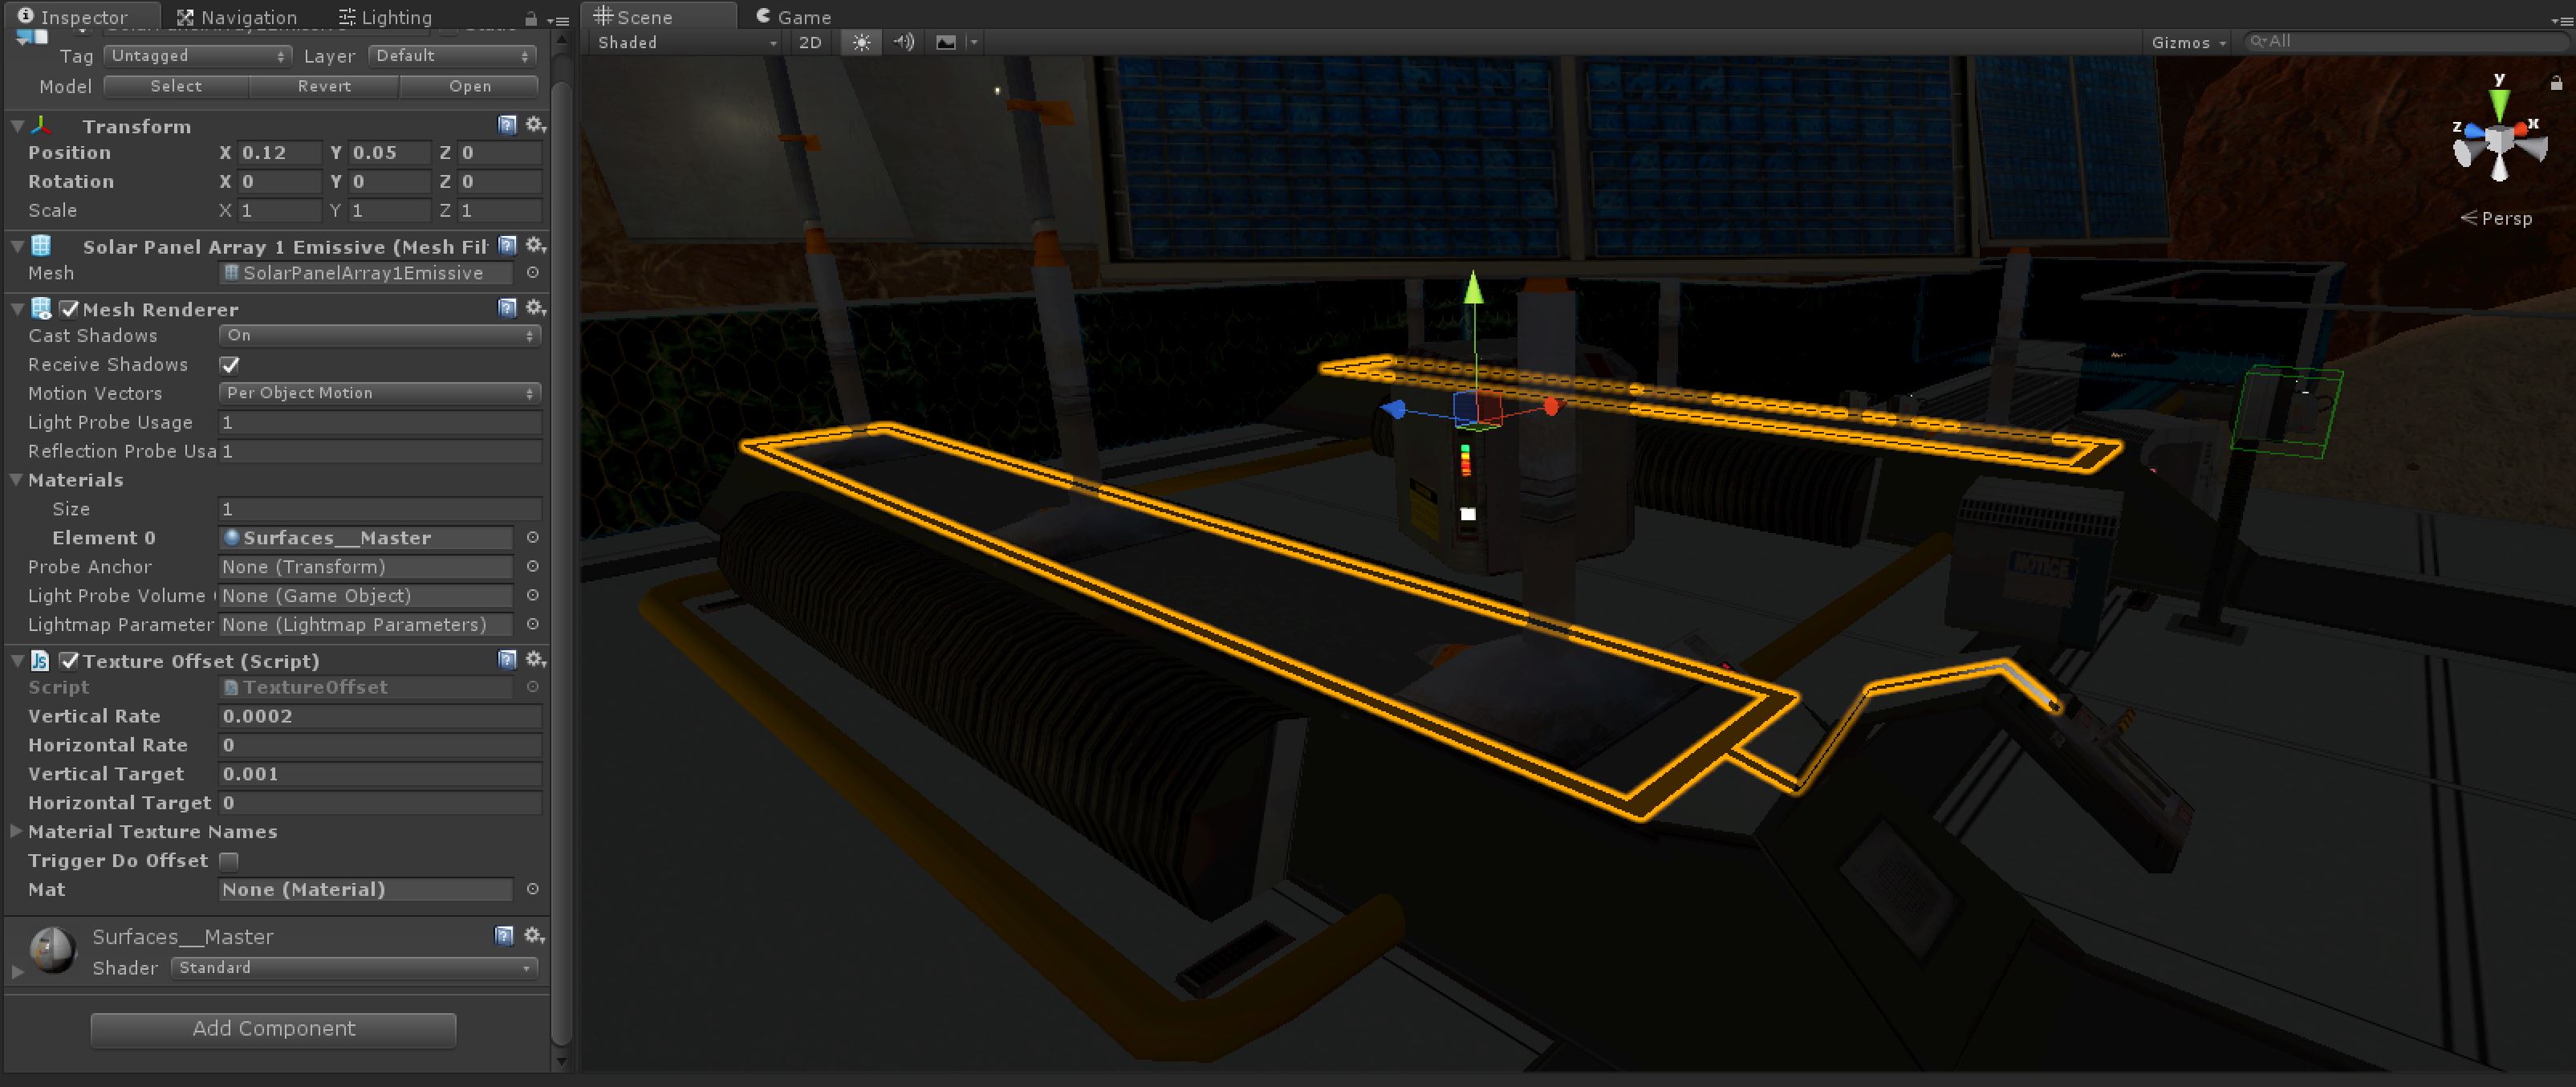
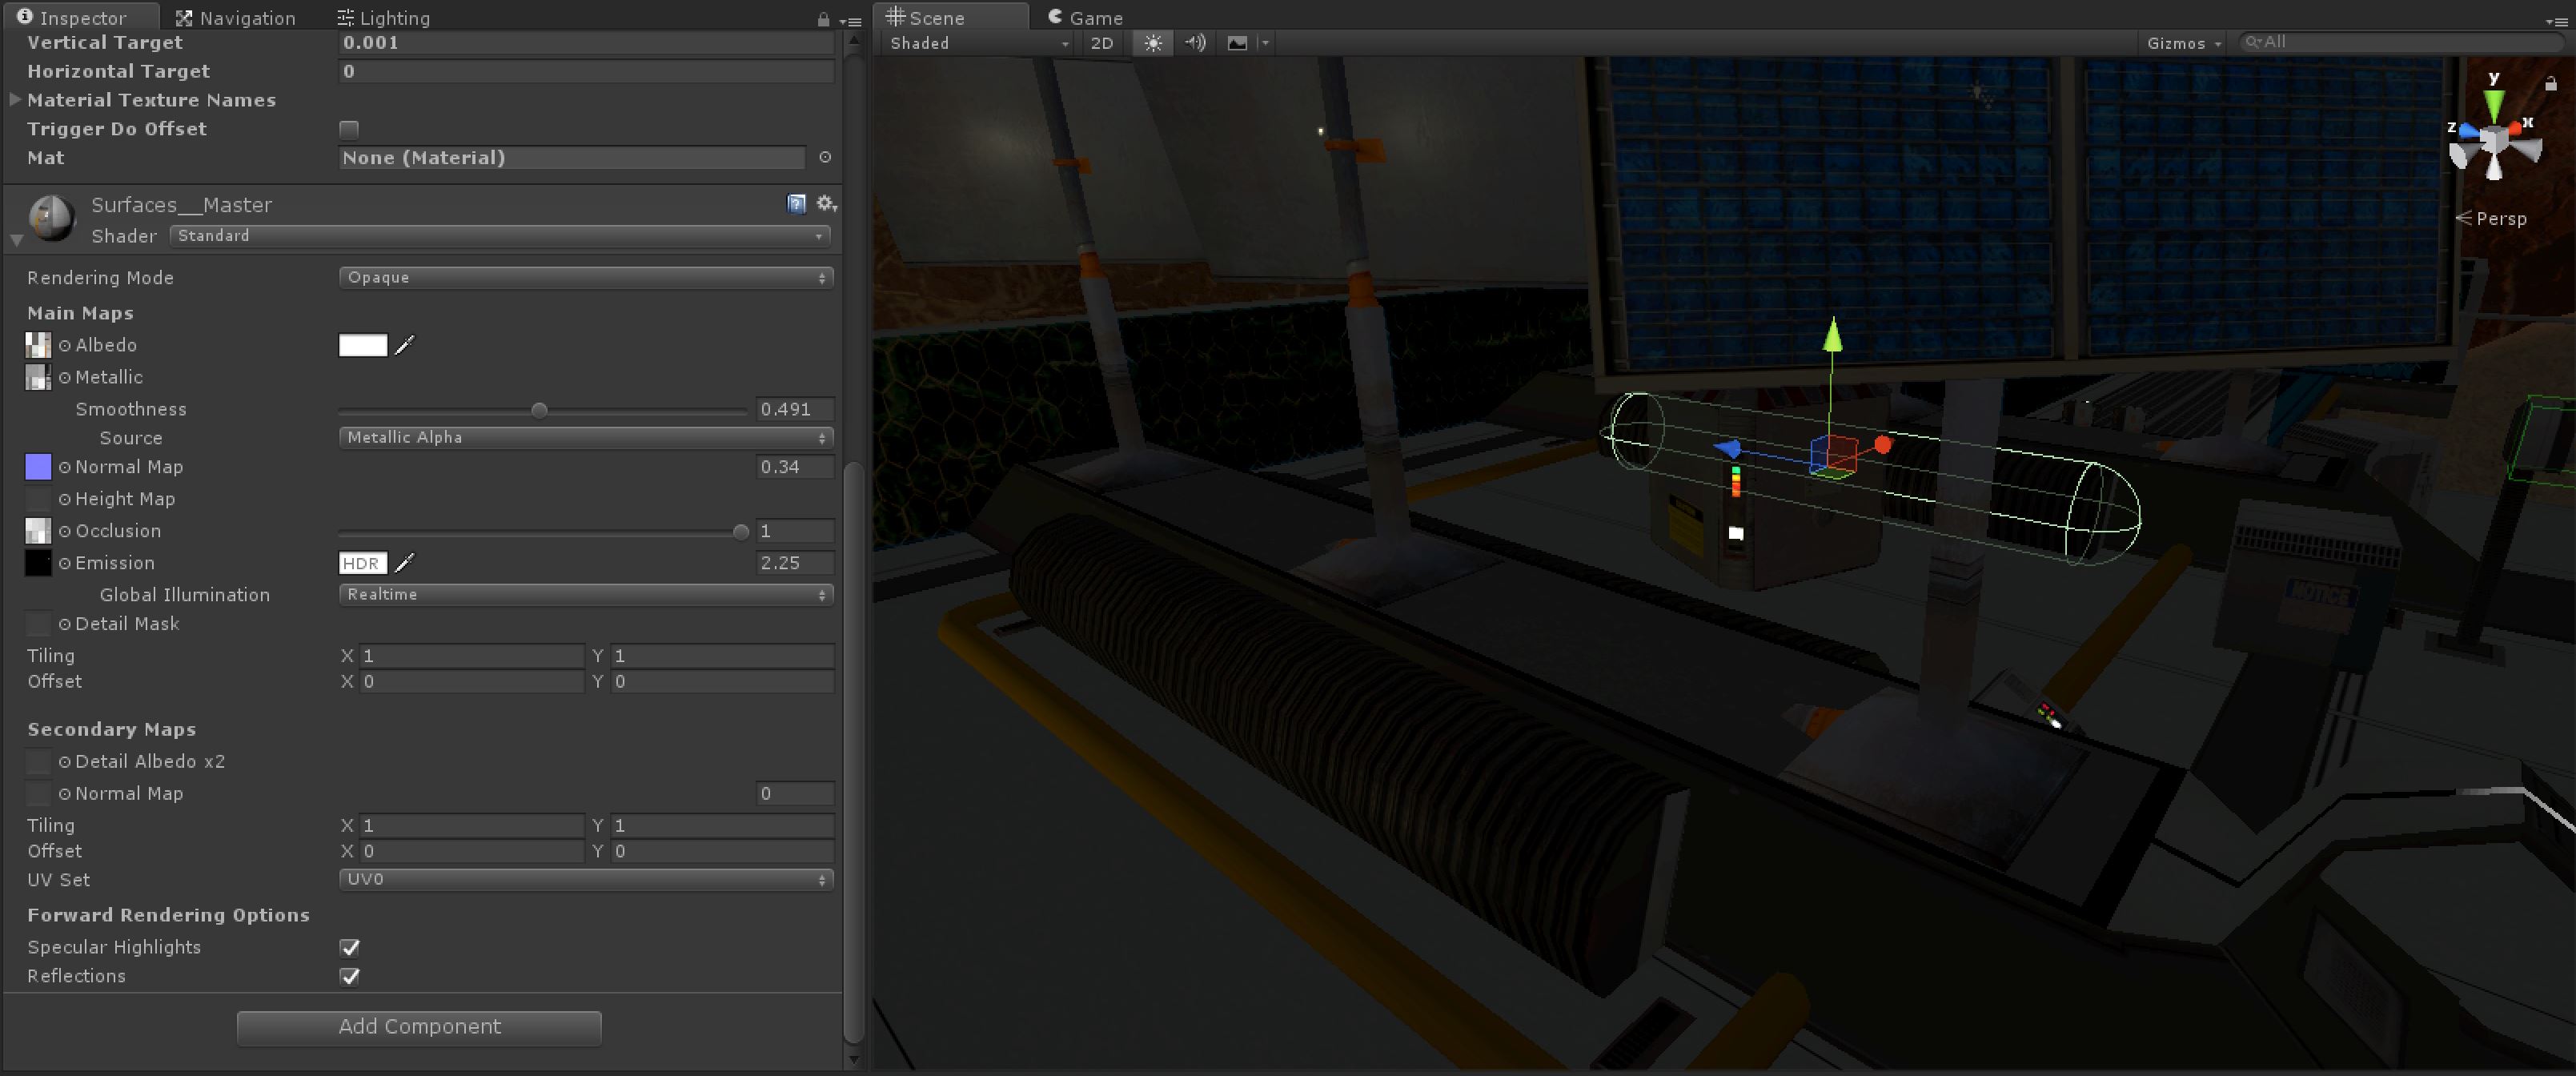
Let's take a look at how it comes together in Unity. In the image below we've highlighted the "power-up" part of the solar panel array. The textures mentioned above in the post are all part of the "Surfaces__Master" material, which is assigned in the MeshRenderer component.
We've also created a script called "TextureOffset" that we'll use to achieve our effect. What this script does it move the material's texture offset value for the instanced material over a specified period of time. The code looks like so:

So basically when the player uses the lever in the solar panel array, SetDoOffset(true) is called and the texture offset is adjusted slowly over time. Note that we're basically offsetting the texture itself and not the UV map, but the desired result is the same. Here's a sequence of images demonstrating what adjusting the texture offset Y value at 0.0, 0.0005, and 0.001 does:
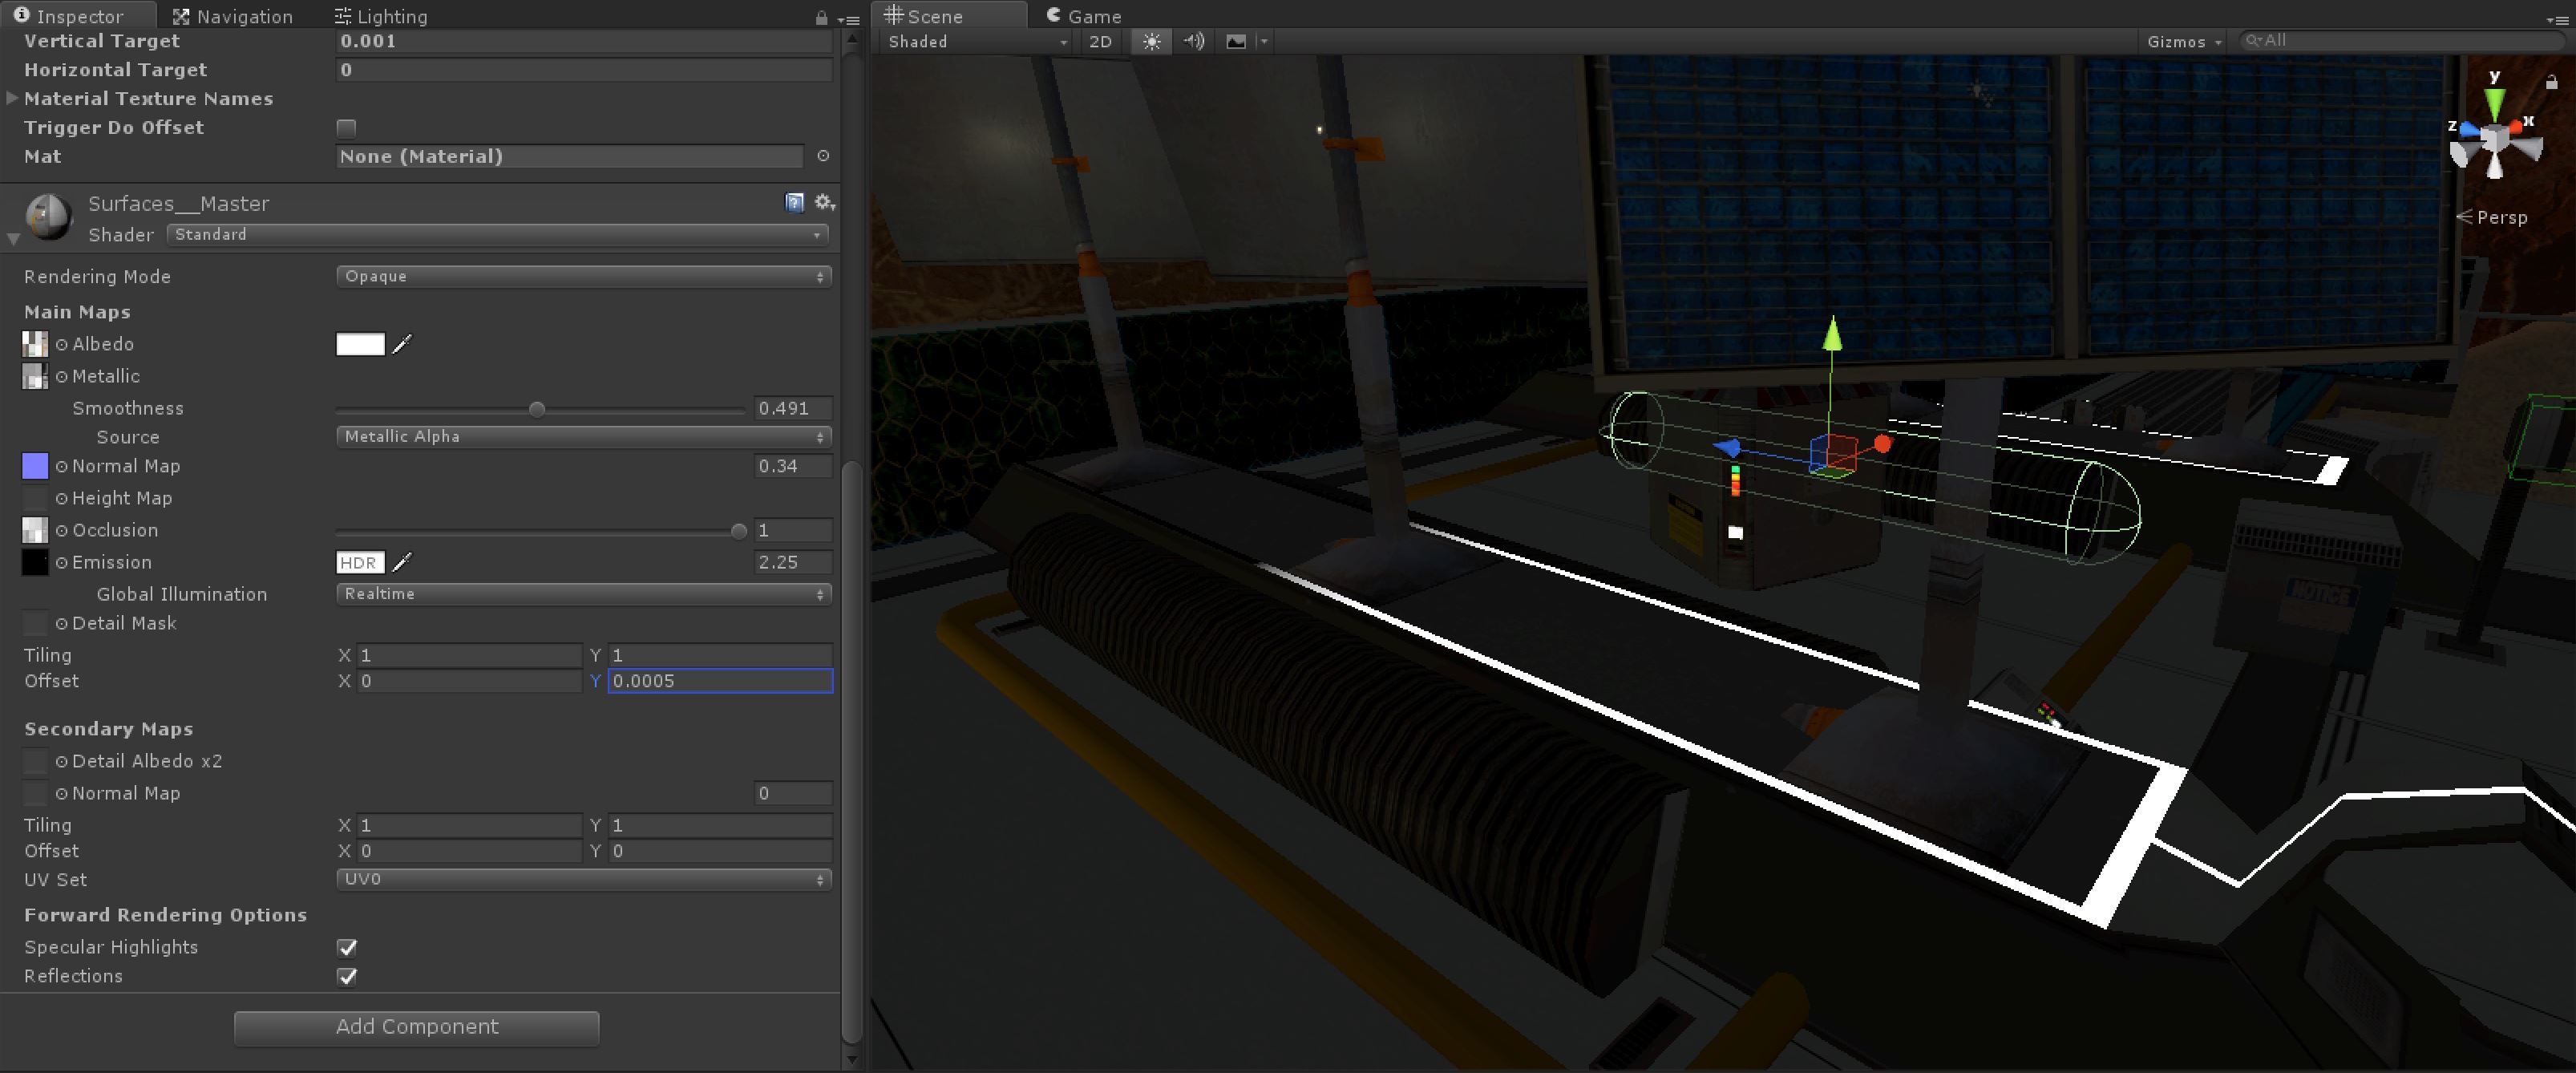
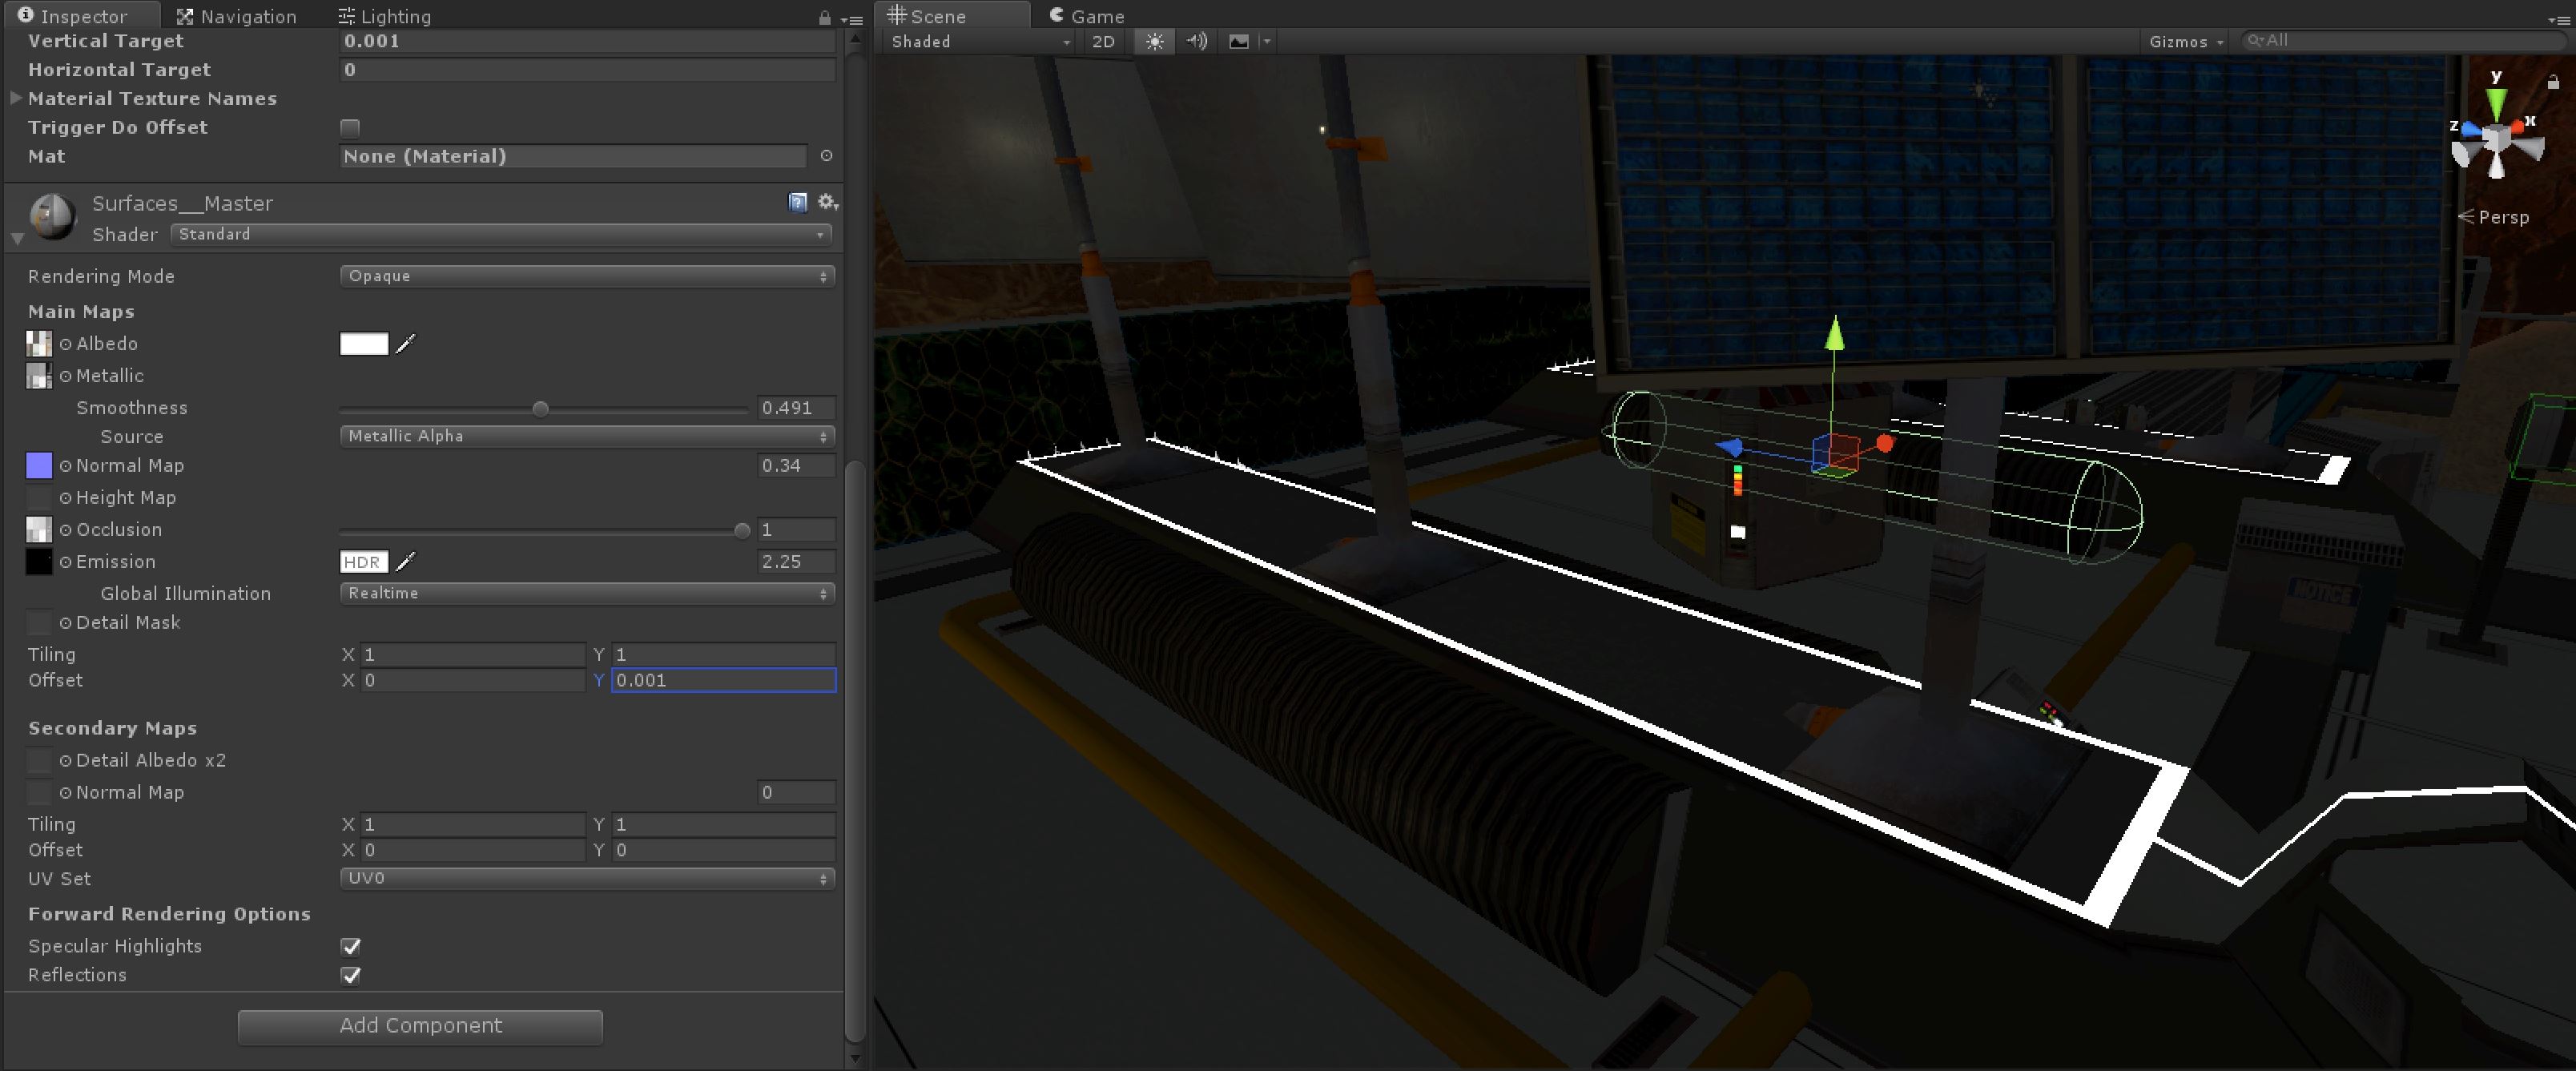
All we're doing is adjusting the offset Y value over time! Here's the effect again with the material selected.
Conclusion
There are likely many ways to achieve this effect and I'm sure there are muchh more efficient and elegant methods. In any case, it was fun to experiment using what we currently have to get a neat effect in a relatively short amount of time. Thanks for reading!
Larry


A neat simple hack for a neat effect.
Neat!