Kurumin
"An experience about survival and integration with Mother Nature"
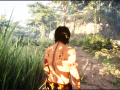
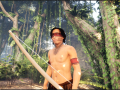
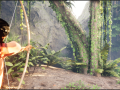
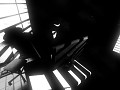
Survive in the middle of the dense forest while defending your village from other players. An extremely realistic experience where each move can determine your victory or reveal your position, bringing you problems. The fauna and flora are elements that can be used to your advantage (or against you!), so learning to master the secrets of nature is essential.
_______________________________________________________________________________
Development of Kurumin has recently resumed.
I'm working on a PvP multiplayer demo that you can play for free with your friends. The basic mechanics will be present in this demonstration with a focus on stealth and village defense.
Most of this development can be followed live on my Twitch channel, where I will show as much of the creative process and gameplay decisions as possible.
_______________________________________________________________________
Articles
In this post, which was extracted from Kurumin's official devblog, I talk a little about the workflow for creating the main character of Kurumni, that will be used as a reference for the artstyle, and how Epic Games' free tools make this process possible.
It is not today that we know that in the context of software development, few markets bring as many technical challenges as the creation of videogames. An infinity of techniques and mastery of complex software are an additional challenge besides, of course, achieving a good balance of difficulty and learning curve to attract players of different ages and abilities.
When I finally got my hands on Epic Games’ cutting-edge technology, the acclaimed engine was already in its third version, and it was distributed via a SDK with some assets coming from Unreal Tournament together with an interesting map editor with a visual scripting system associated with the level and a very interesting scripting language. But for a solo developer like me, the UDK was far from enough to allow me to create really attractive game mechanics with a nice look, in addition to a workflow with few realtime features, which made the creation of a project that didn’t was a mere object of practically unfeasible study.
The market has changed, engines have become popular, and the Unreal Engine has changed once and for all the workflow for developing mechanics and visual editors with greatly improved visuals and a new way of programming, through Blueprints. This completely changed the distance between a fantastic game idea and its actual implementation, allowing for a clear division between engine framework elements and the unique structure that relates to your game specifically. Many independent projects emerged during this period, including those made by solo developers.
One of the great difficulties, specifically for me, who am a programmer and have little artistic experience, has always been the creation of organic art, the world and the living beings that inhabit the universe of my game projects, precisely because the ideal creation of Gameplay mechanics are directly related to constant tweaks and changes to raw assets in order to create truly unique effects and abilities. But that has just changed. A new workflow, which I like to call Epic Workflow, seemed ideal and capable of bringing satisfactory results to my game project Kurumin, which I am developing as a solo developer using what appears to be the most amazing and fun engine yet for developers with few resources and lots of ideas, the Unreal Engine 5.
I call this workflow that way, simply because all (or almost all) of the challenges encountered in developing a game project using Unreal are solved through a solution recommended by Epic itself. Incredibly, it seemed to me that they really understood where the game designer should really spend most of his time, and behind that there’s a feeling of “the editor takes care of it for you” that greatly improves the usability and speed of development. During the entire development of this project, I used an Acer Nitro 5 gaming notebook with 16GB of RAM and a GTX 1050 with 4GB of vram. It’s a decent piece of equipment and it allowed me to work with multiple tabs open in different editors without major performance issues.
The current flow involves a software stack that I will describe along the way.
It is important to say that this is not a tutorial. It’s a breakdown of the process I found for my game, and when we’re talking about workflows, the important thing is that you find the one that best suits you! If you’re looking for tutorials, there are plenty of excellent ones in the official documentation itself, and many more on the forums and youtube. I know you know where to find them.
But if you really want to take the time to study everything about the engine in depth, I recommend taking a look at Unreal Learn. The content there is amazing and free.
Alright, so let’s start from the beginning
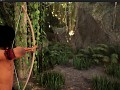
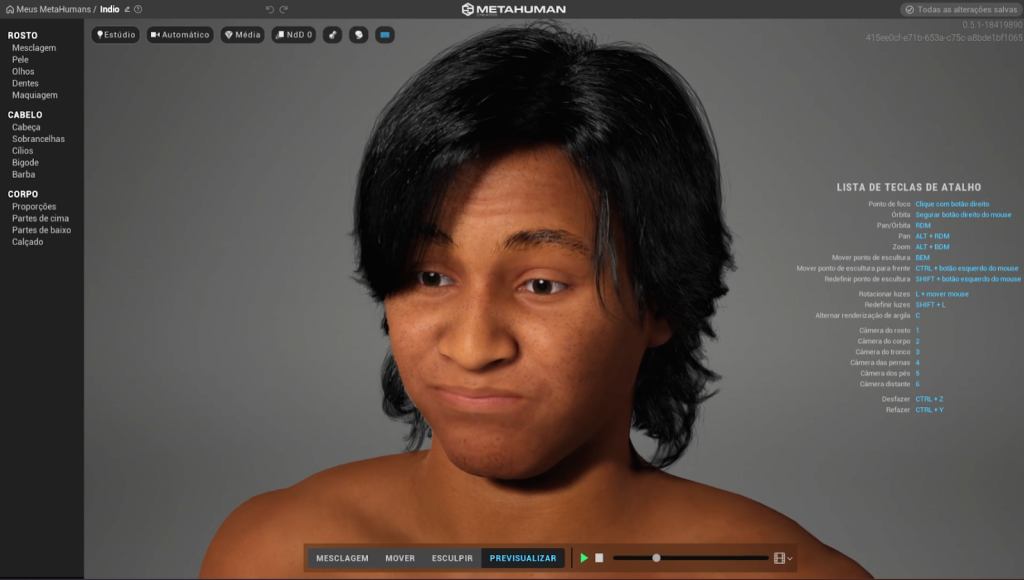
MetaHumans: where it all begins
The new tools and solutions in the area of animation and creation and configuration of assets within the editor have drastically improved what makes you spend more time inside the editor and less time in a dcc like Blender for example, and still be able to implement mechanics and interactive systems with full control over gameplay, respecting a solid framework used by hundreds of games released over the years . The first step is to bring a base indigenous native, into the scene.
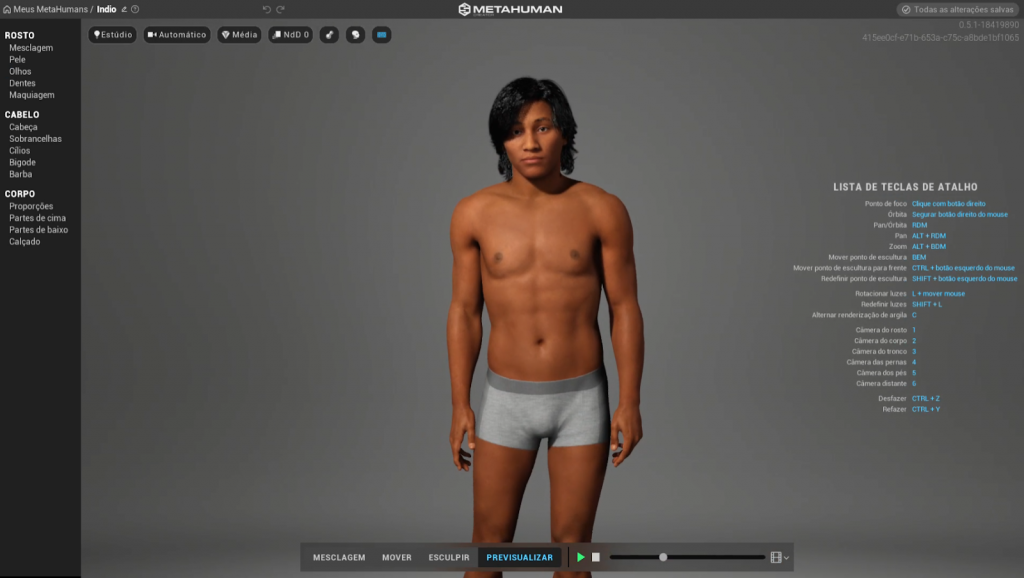
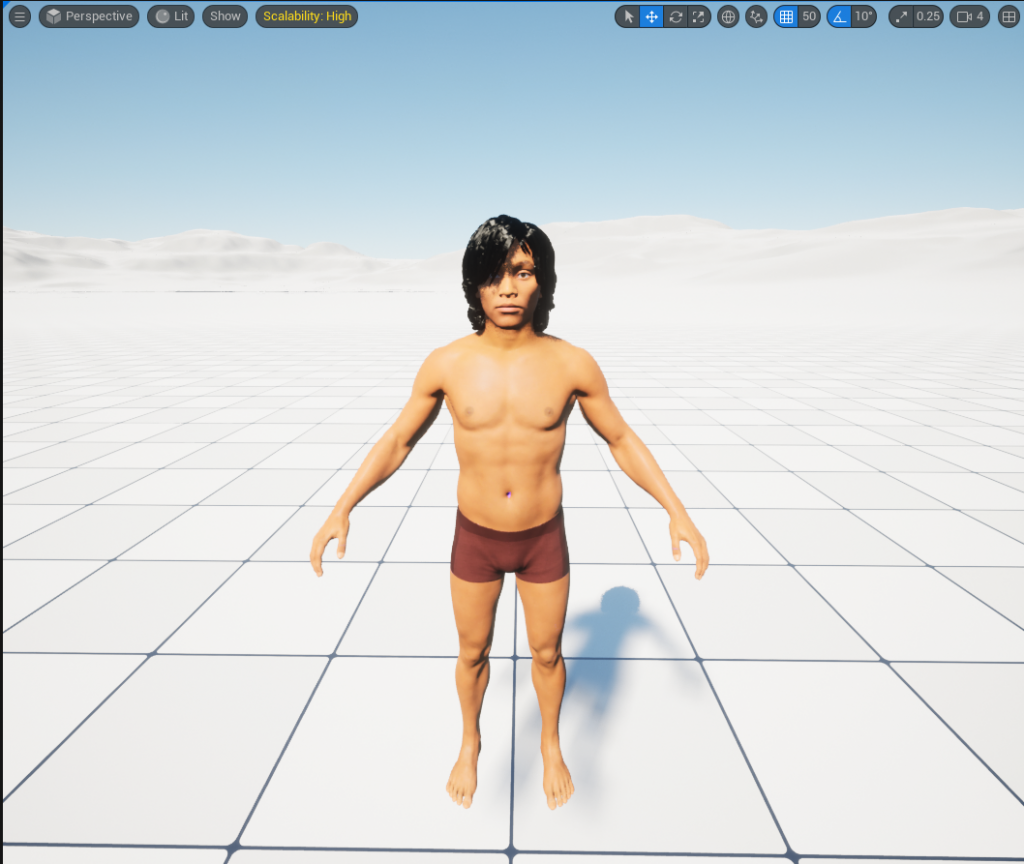
The key to good gameplay programming is undoubtedly having full control over your character’s movement and the ideal solution for creating this base model is the MetaHuman Creator, a tool capable of creating really believable, highly optimized and with materials and pre-established configuration geared towards games and digital arts in real time. Thus is born the first version of the character.
It’s not easy to create a mesh base that respects the anatomical laws and has a productive skeleton, not to mention a possible rig that can help in the animation process. In an ideal world, you should just focus on the visuals and leave those technical factors aside and focus only on what really matters to your storytelling and gameplay. And believe me, MetaHuman Creator delivers just that!
A nice 3D model to work within the editor, with a robust skeleton, a set of bones already designed for the application of inverse kinematics and a very high quality rig that generates incredible results.
First layer of realism: Inverse Kinematics
Okay, now that our hero is imported into the scene, we can start the fun part: programming that will bring him to life.
Creating quality animations has always been a challenge. Great titles that serve as inspiration for Kurumin, like The Legend of Zelda, Papo and Yo!, Rime and etc bring quite convincing systems and one of the secrets that make a big difference is the so called inverse kinematics for the alignment and adjustment of the feet in the landscape. This is essential for a game with so many variations in the landscape, as is the case with Kurumin.
It is necessary to mention that in UE5, implementing this became extremely simple and straightforward, with the use of Control Rigs, which is now no longer an experimental feature and becomes a fundamental part of the engine’s animation system, and certainly will be used extensively by many independent and AAA projects because it is simple to implement and brings fantastic results.

Basically I create controls that will affect the bones of the legs and make a trace to identify the floor and its normal, which will be used to correct the rotation of the feet.
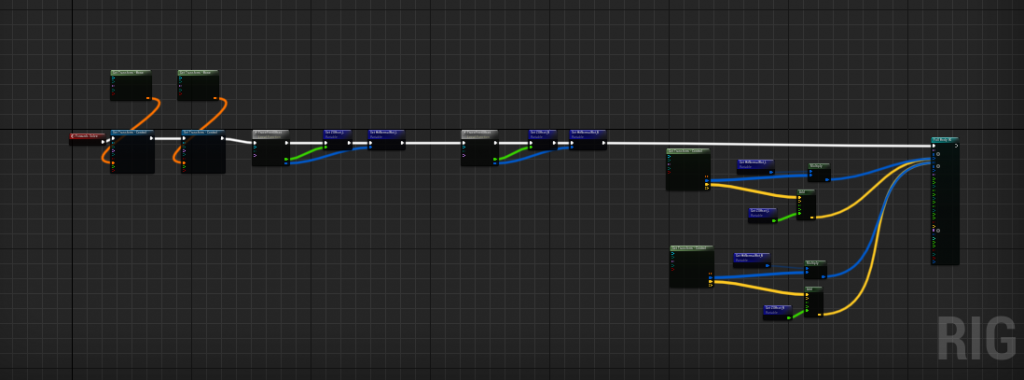 Control Rig is pretty straightforward, ending with variables that feed the FBIK node.
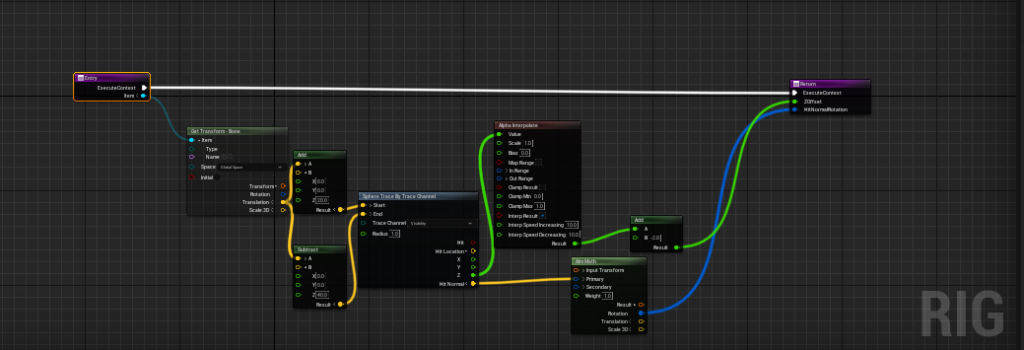 This function traces and finds the place on the floor to place the foot. The same function is called once for each foot, so a variable is passed in the Input of the function.
After some time adjusting trace height values, and rotation stiffness in the pelvis bone, the final result was as follows.

Fullbody IK solver in Unreal Engine 5
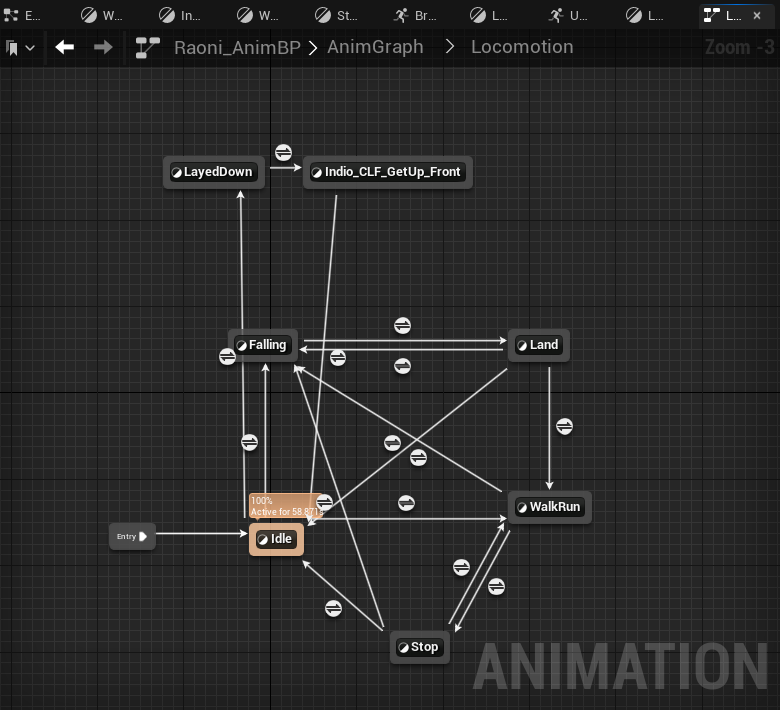
The locomotion system
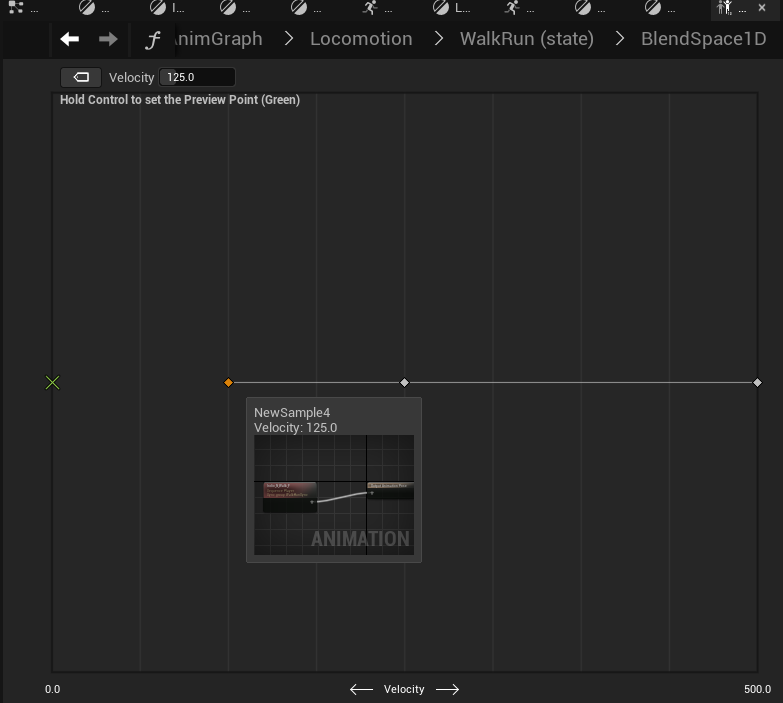
After this first layer of realism, which has already brought very interesting results, I start working on locomotion in general. Initially, with a simple BlendSpace1D to get an overview of the transitions and find a nice moving speed that is pleasant. One of the amazing features that is also new to UE5 is the fact that every animation sample in a BlendSpace now has its own AnimGraph. This allows an extra layer of control over what we really want to interpolate in this BlendSpace.
It was not difficult to arrive at an acceptable result. It didn’t take long to create a state machine. This was necessary because I wanted some states to have an effect on the gameplay.
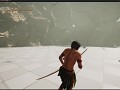
For example, when the player falls from a great height, he goes through the Landed state, which in turn prevents the player from walking. It’s a few milliseconds of punishment, which in addition to bringing more realism to the characters movement, also makes the player plan well where and when he will jump from one place to another, knowing that the fall will have consequences.

oops, be careful with the step
 We cannot deny the importance of transitional states such as stopped and landed. They make a good visual difference even with simple animations.
A simple state machine is what controls the player on his path (for now only terrestrial), which together with the IK layer, and a bit of programming in CharacterBlueprint to affect the locomotion speed based on the ground normal found, the result it was like this

The character begins to show signs of life
The Roll
One of the main abilities in Kurumin is the roll. A skill like this involves many aspects of gameplay and these aspects are often spread out across different places in the engine. For example, checking whether or not the player can roll is likely associated with factors such as “is he on the ground?” and “he is not making a roll at this time”, etc. Clearly we need to implement a feature like this in at least two classes, or two Blueprints, the first is CharacterBP and the second is AnimBP. But we’ll probably want to easily change these values so we can balance gameplay at some point in development. Remembering where each variable is in a project whose framework is so solid and complex can be an extra delay to be avoided. Ideal would be if we could program all aspects of this skill into a single class and expose only the variables relevant to balancing. That’s where the also recently launched GAS comes in.
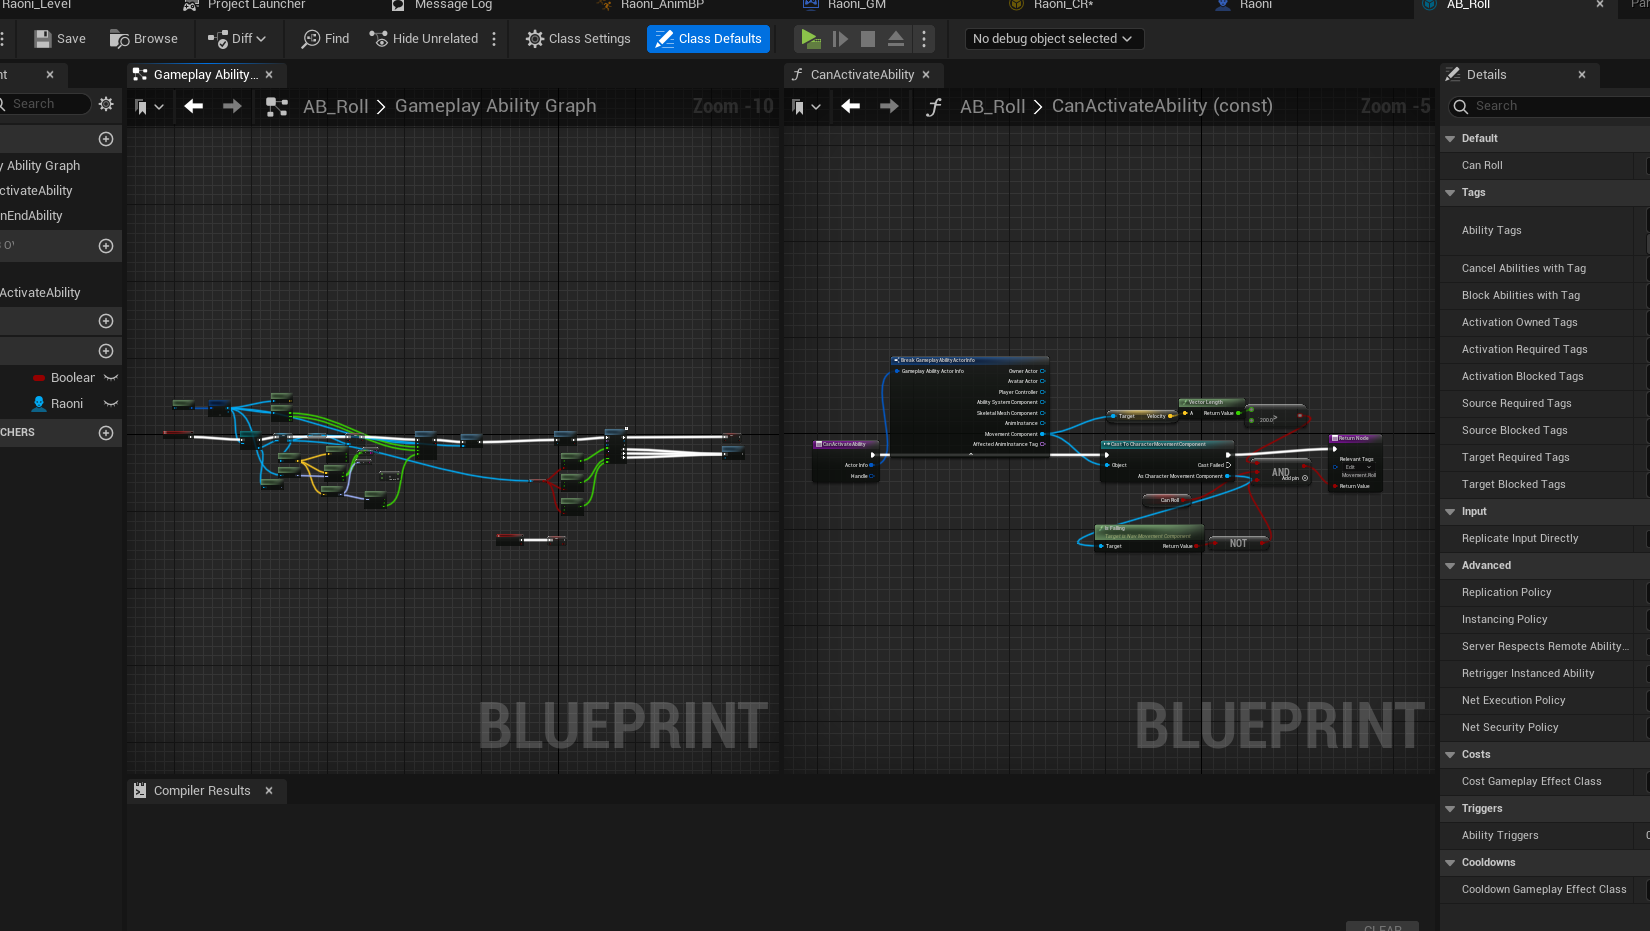
All aspects of the roll were implemented in the same class.
I confess that as an experienced programmer, I was a little resistant to this programming method initially. I had the feeling that I didn’t have full control over the skill’s logic (after all, I didn’t clearly see a flow of information like a visual graph within a blueprint). However, after studying a little better the classes of this system and the way they talk to each other, it is more than proven that this system is effective and extremely useful for a solo developer. The class that represents the roll skill needed to be implemented and some auxiliary functions already bring the functionality to check if the skill is allowed, what is the cost (if any) and what is the visual aspect it will bring. It was a different way of programming, changing values and checkboxes in classes, instead of writing classic code, but the result was very good and pleasant. This facilitated the extra layer of control I want to give the player at the time of the roll, making a roll right after the first one fit well into the animation and give an advantage over the roll, allowing the character to quickly dodge using the roll.

The direction adjusts to the controller in the roll
The roll blends well when the character is sprinting

roll with console command slomo 0.3
On the gameplay side, the implementation was all done using the gameplay ability system through a well-configured class inherited from GameplayAbility, while on the animation side, I chose to make the transition using an AnimMontage that overwrites the character’s total pose.
Texturing with Bridge and Mixer
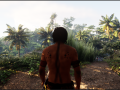
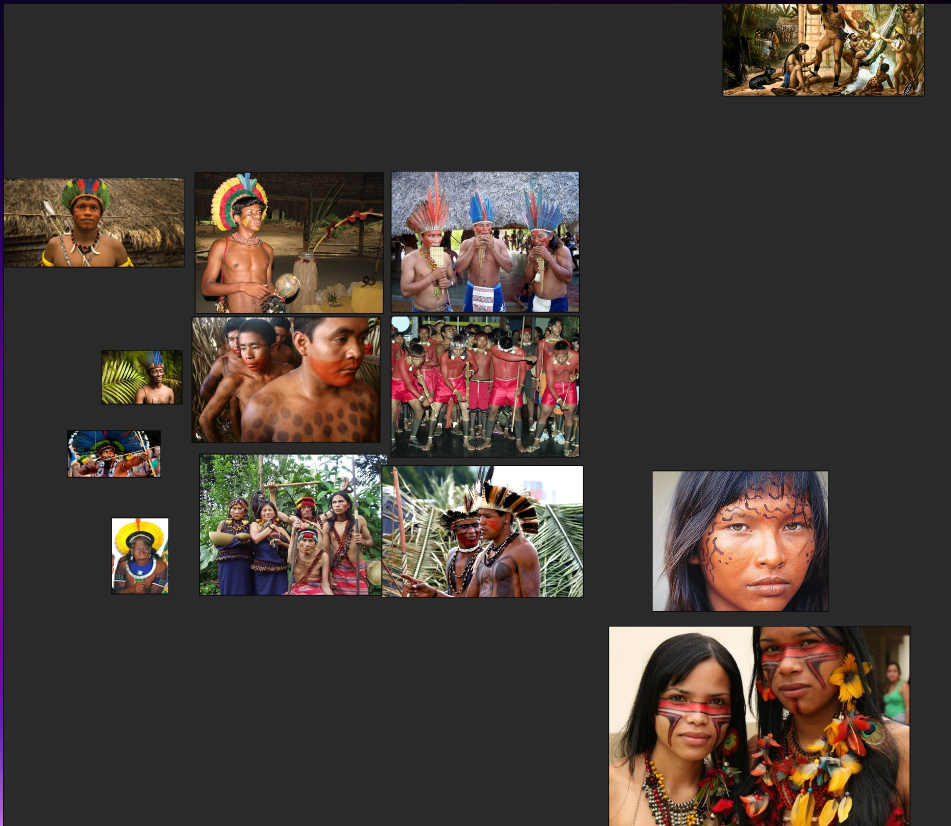
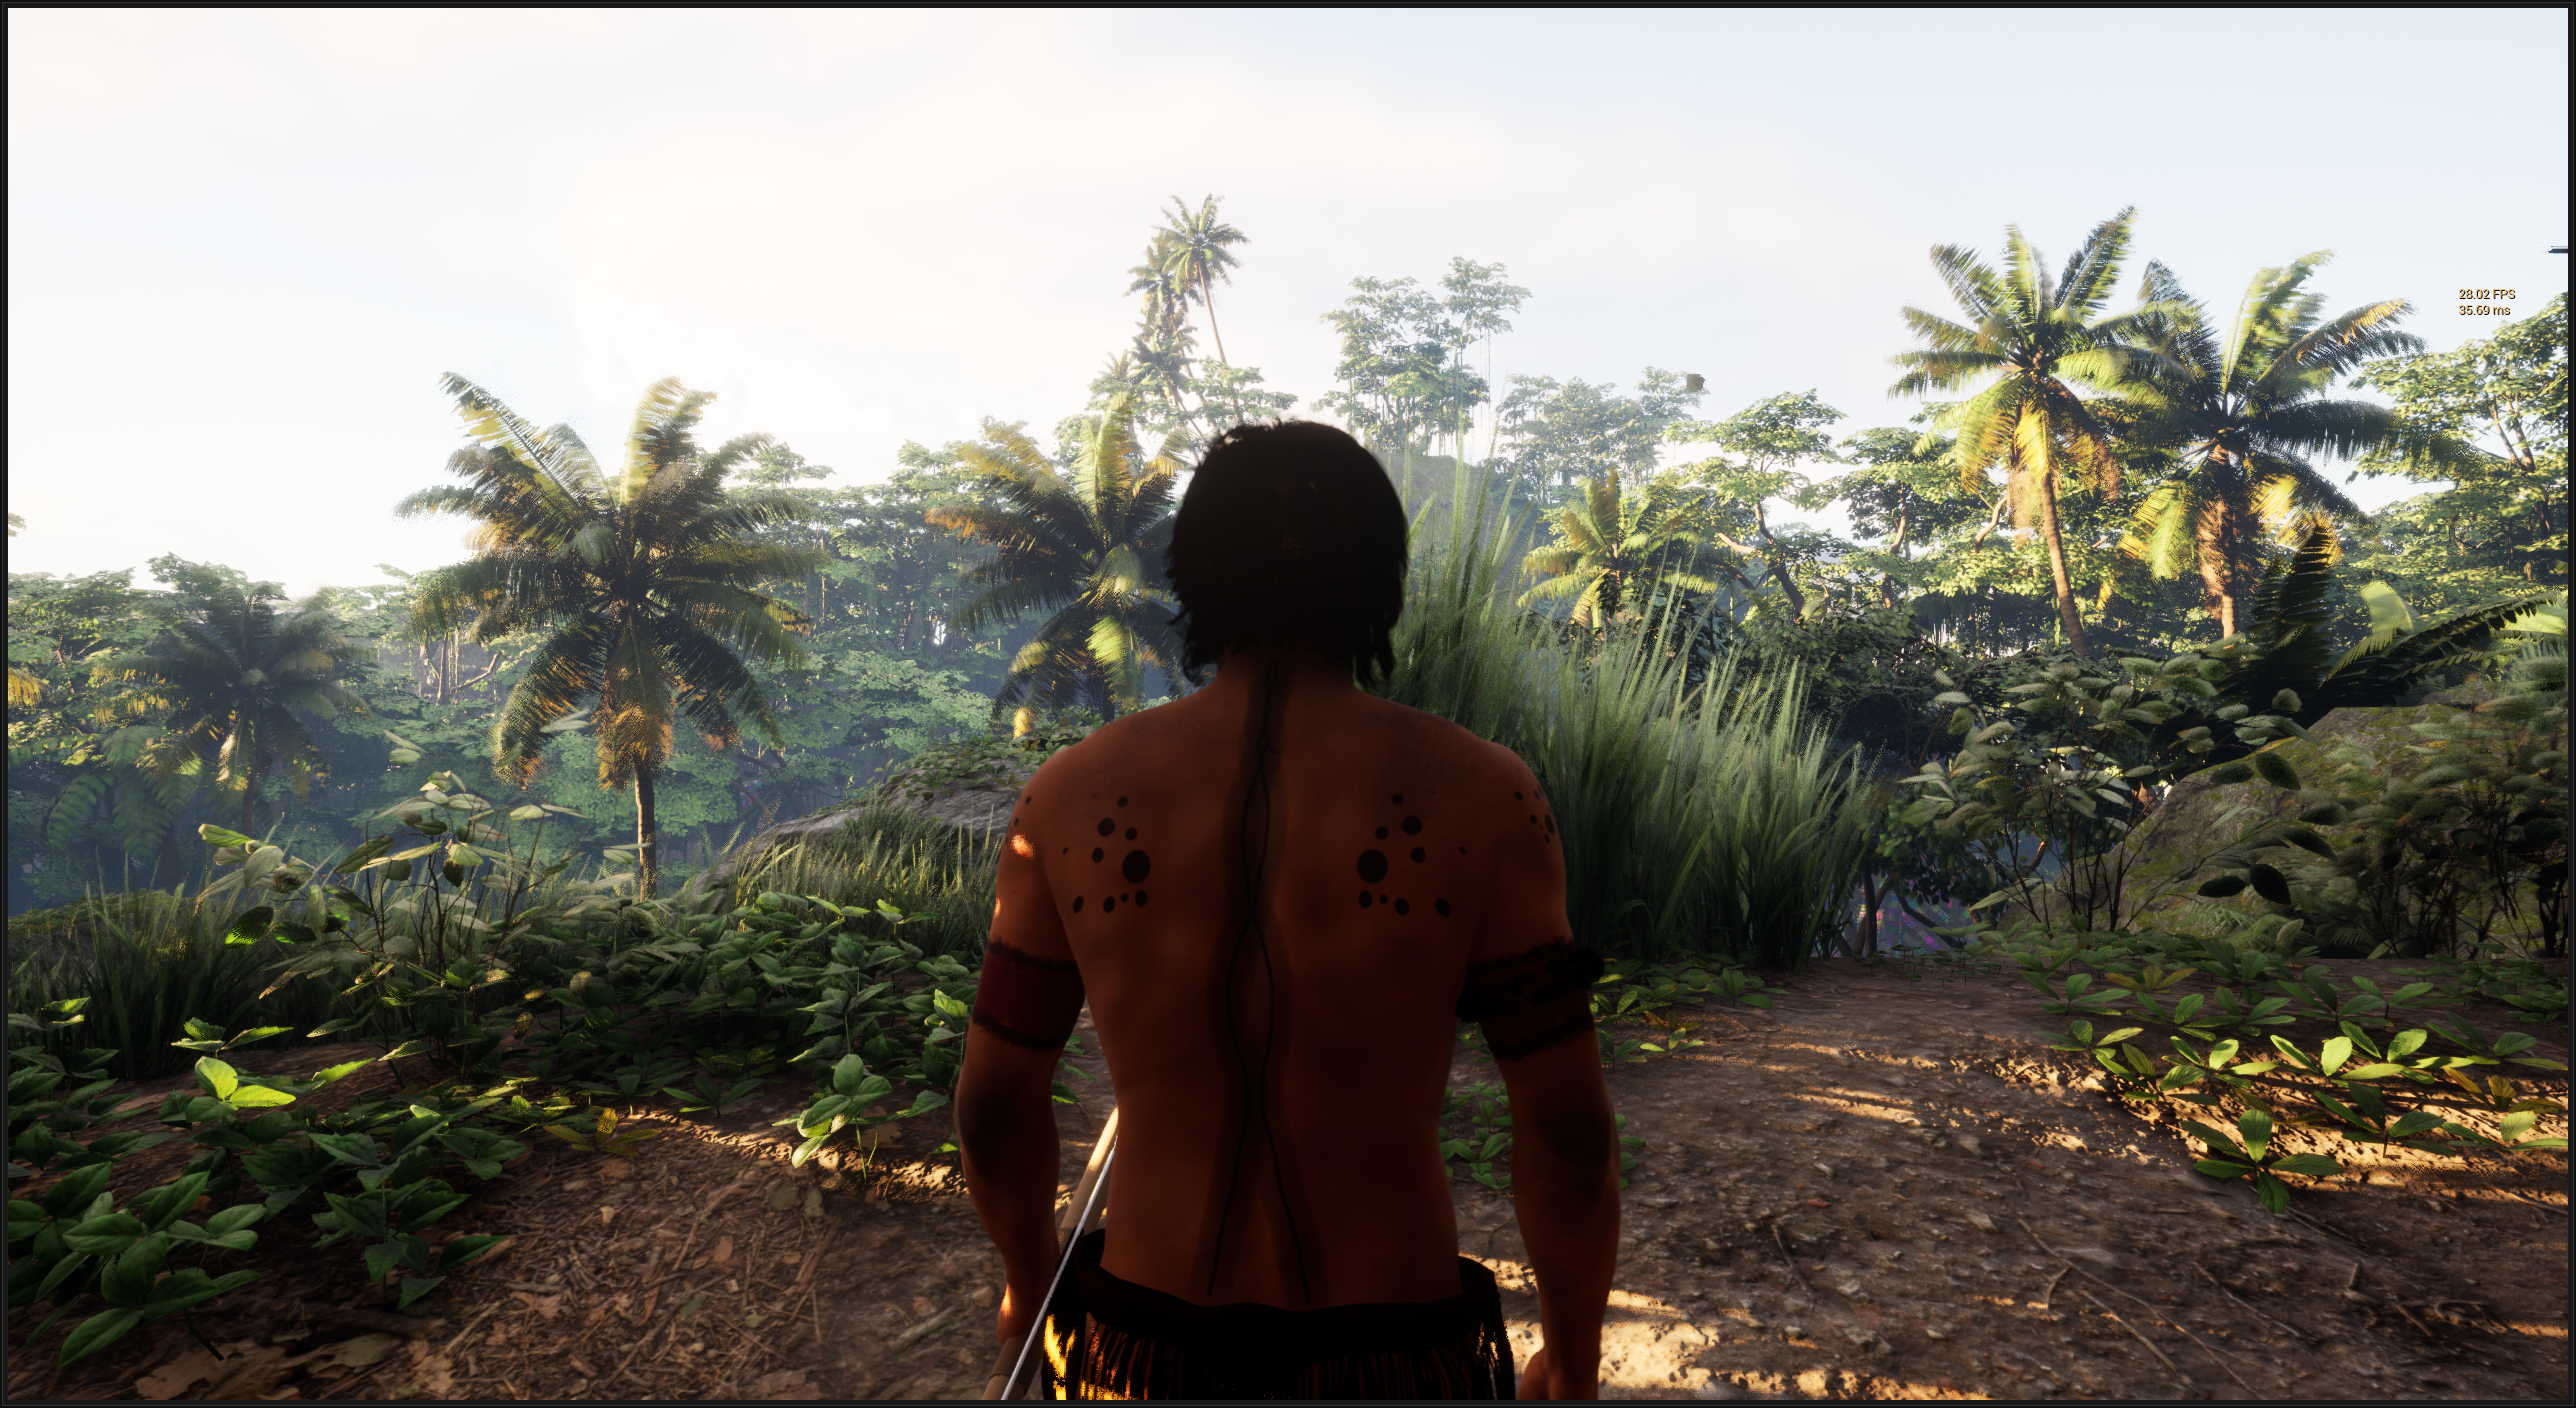
At this point, I thought it was time to give the base character a look a little more like an indigenous person from the Amazon tribes. I’ve already said that my artistic skills are not the best, and I’ll probably need the help of some friends to deliver a more professional result in the texturing, but for now, a light coat with paint simulating the common practice of dyeing with the plant Annatto (or as we call it in Brazil, “Urucum”). This is the time when the developer should cling as much as possible to real references and images that can bring inspiration, but never let super realism limit your creativity.
PureRef with some references. Very important!
If you haven’t already, I recommend the PureRef software, which makes it easy to collect reference images and is always an open window during the development process.
We know that it is possible to export a SkeletalMesh from the Editor, so we have an FBX to be able to work and texturize in any dcc of our choice. What you probably don’t know is that (at least until today) a MetaHuman body model, when exported to FBX, has a small issue that prevents direct texturing in Quixel Mixer. Without correcting this, it is impossible to carry out the painting.
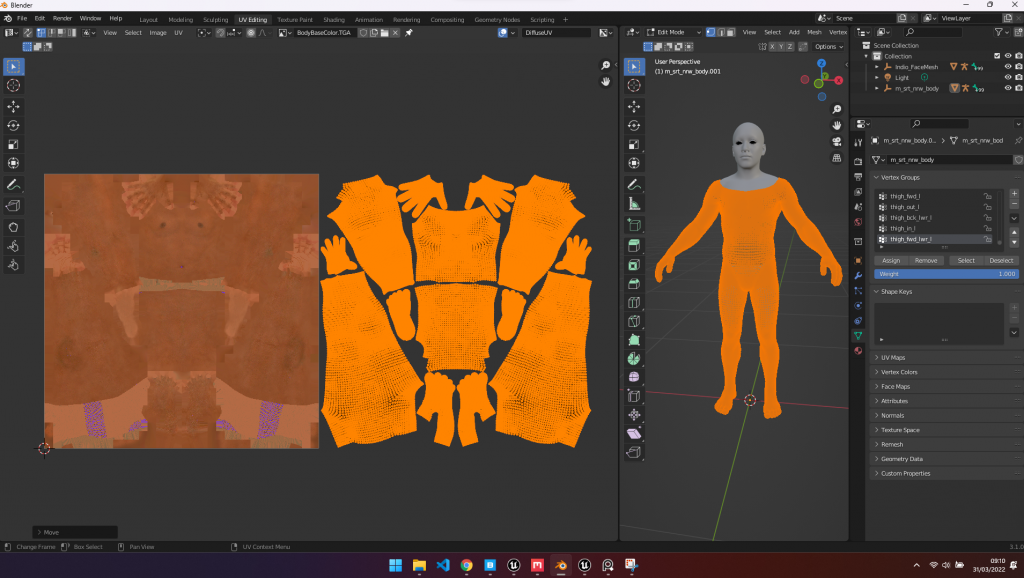
UVs out of correct space
If it weren’t for this problem, we could go straight from the editor to paint in Mixer, but because of this little caviot, we need Blender halfway through. It is also worth remembering that this only happens with the body mesh. The head is exported correctly.
After correcting our hero’s Mesh and importing it into Quixel Mixer, the job was to respect the references and create a layer with some dirt and dirt on the body, and insert a light red layer to simulate Annatto. Needless to say, the SmartMaterials and Mixer layering system were helpful in this process.
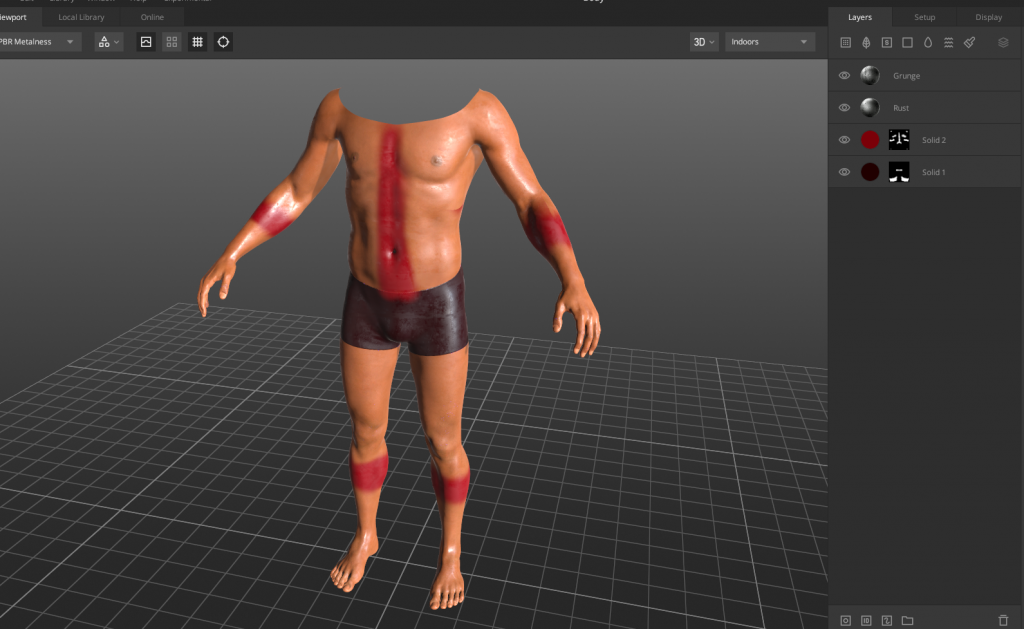
Texturing the body in Mixer
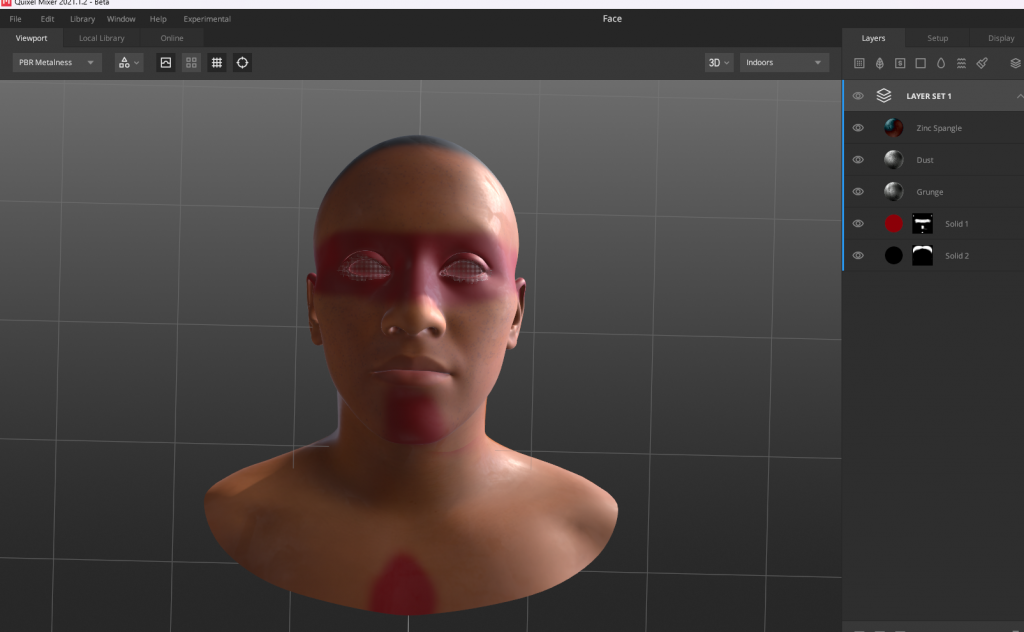
Texturing the head in Mixer
 After texturing, with the textures exported from Mixer
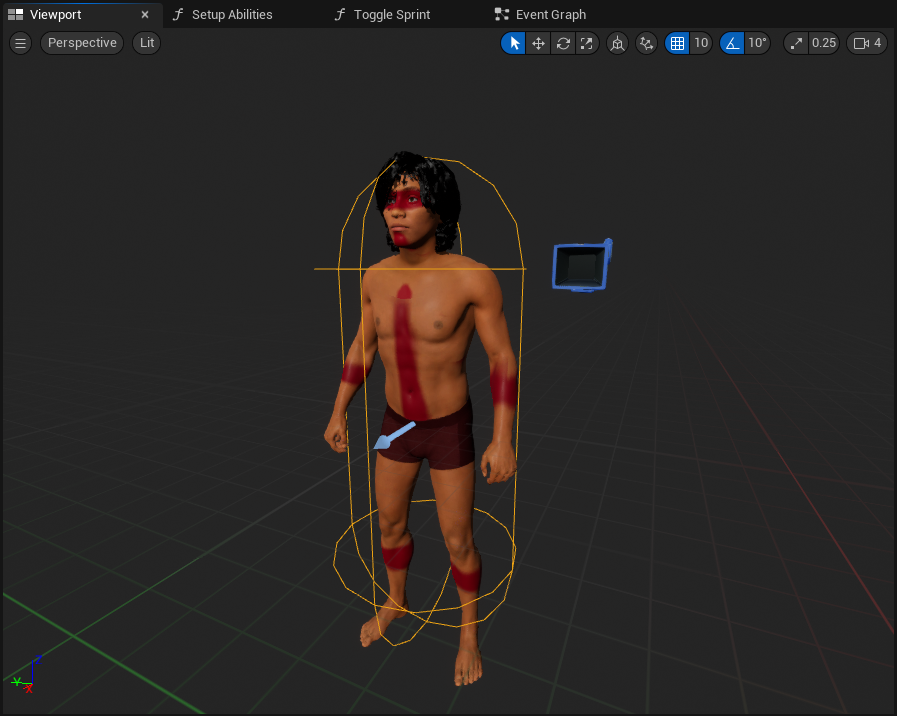
And with this workflow, I’ll be able to add many more layers of detail throughout development. Here is the result after importing the textures and replacing the references in the material instance.

Painted version

Last layer of realism: hands and breath
After this moment I finish the first iteration of the base character with an implementation that I consider important despite not being something extremely obvious to the player. It’s an extra layer of random animations that are played on the hands and the breathing layer.
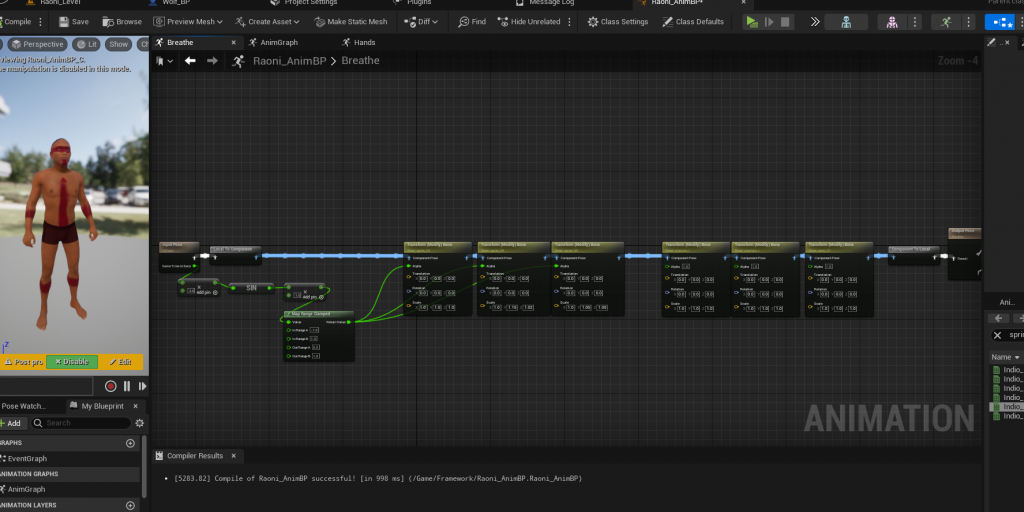
For this effect I actually scale the bones of the spine to give the illusion of air entering the lungs.
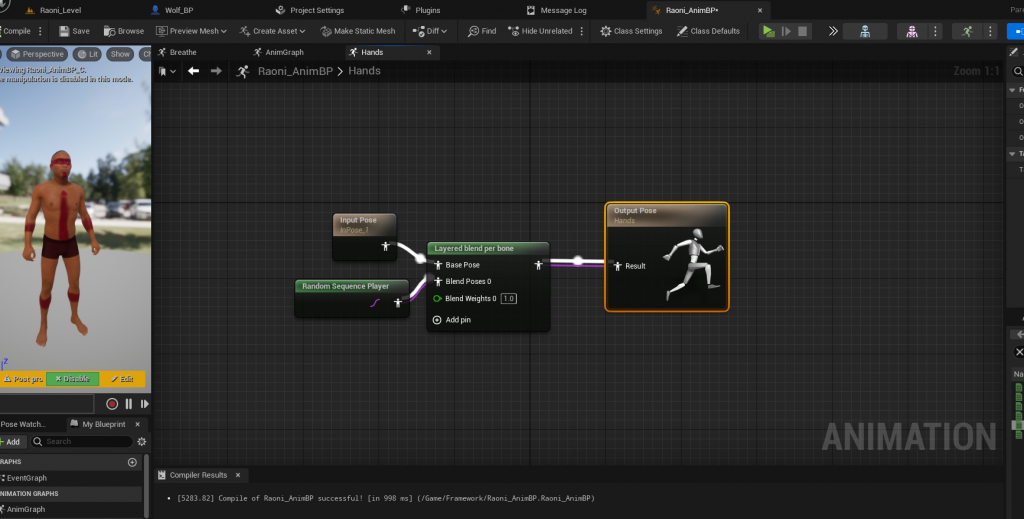
For the hands, I simply play a random animation that contains a different pose for the hands, and apply it to the hands only, using the Layered Blend per Bone node
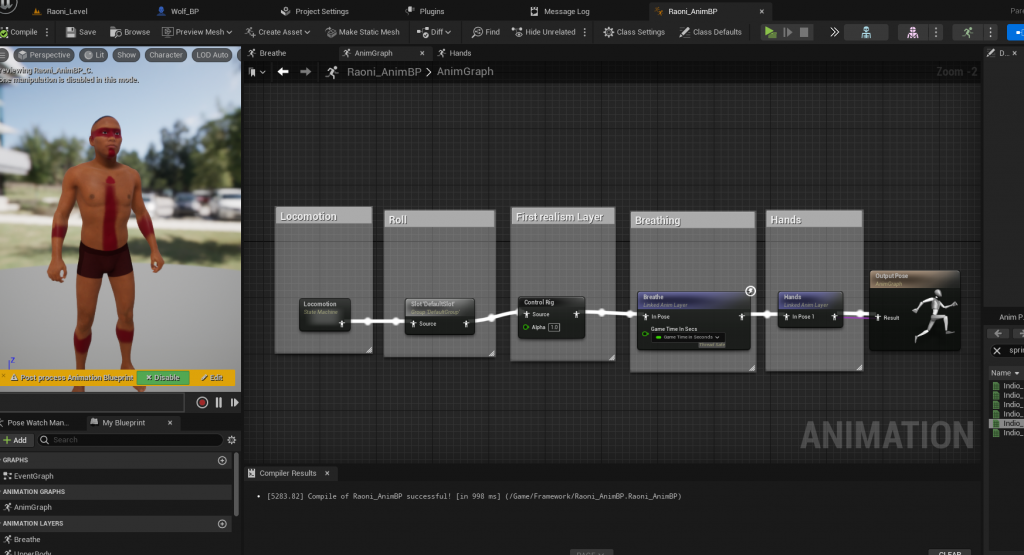
Finished AnimBP for the first iteration of the base character
Well, this is basically the beginning of a long process that will add more layers of detail and abilities that affect gameplay, so there’s a lot to do, but this is a good start. Thanks for your interest in Kurumin, soon I intend to publish more about the development including the techniques for creating the scenarios and other elements of the narrative that will be fundamental. Thanks!
Post a comment
Profile
Icon
Platforms
WindowsCreator
gbolanhoEngine
Unreal Engine 5Contact
Send MessageRelease date
Game watch
Follow
Style
X
Tags
Embed Buttons
Link to Kurumin by selecting a button and using the embed code provided more...


You may also like
Into the Radius VR
Stealth

Just Another Night Shift
Stealth
Spectre
Stealth
Private Infiltrator
Stealth
Secret Neighbor
Stealth
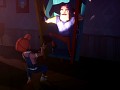
Turnover
Stealth
Best of luck.