Ok, so when taking a video, lighting is like the low hanging fruit - you can purchase/make lighting for relatively cheap and it can really improve the quality of your video! I can't say I'm 100% satisfied with the results, but I'm a total n00b when it comes to photography, filmography, lightography, whatever.
Looking around teh Interwebs, it seemed like 3-point lighting was the most basic and flexible setup. I also found this great Do It Yourself lighting video which included materials required for purchase, how to setup the rig, and some common issues.
My shopping list was:
3 clamp lights
1 pack of 4 energy efficient bright white compact fluorescent light bulbs (60watt equivalent)
1 pack of 1 energy efficient bright white compact fluorescent light bulb (100 watt equivalent)
1 worklight (thing is beefy!)
The total rig cost me about $80, but I had also bought a couple of extra lightbulb packs I didn't end up using for the lighting, so the overall cost was closer to $50-60. Not bad!
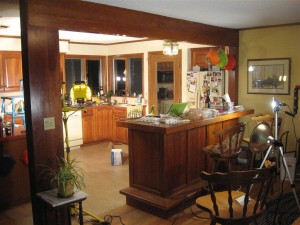
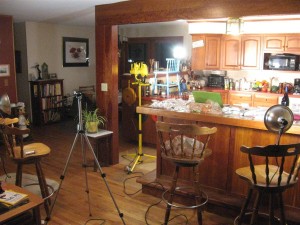
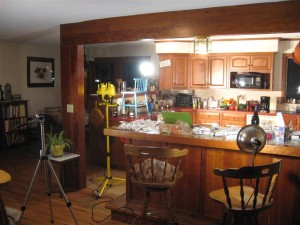
Here are some pictures of the setup, and a video of me being a total toolbox. I'm not entirely satisfied with the background lighting, but I fixed that later. Bask in the glory of 3-point lighting!

lights producing much specularity, especially the bg-light, maybe a diffusor could help.
You're totally on track there! A diffuser probably could help with the shine. In fact, I had also wanted to purchase some lighting gel's, which are sheets of gel which change the quality of the light. Unfortunately, the store which had them was pretty far away, and I didn't have time that day to pick them up. I will probably do so in the future if I do lots more videos.
Diffusion would help a lot - as well as specularity, the shadow your arm throws is distracting. The footage is also fairly overexposed at the moment, although diffusion would mitigate that somewhat.
Good point about my arms shadow - do you think that can be solved by using a better positioned key light, or by just not moving the arm?
Proper 3 point lighting would be two on either side of the subject, adjusted so that the subject isn't getting washed out with a main light over head. Since most people wont have the money to spend on a proper studio with a huge soft box over head. You want to point your strongest lighting at the ceiling. This will reflect and diffuse on the subject.
As for your two side lights, I've always loved this DIY project.
Alexcampagna.blogspot.com
Replicating his lights ends up coming to about 40-45ish with the diffuser and I already had two spare light stands I use for backdrops and extra strobe stands. I did a slightly different spin on his junction box, I used dead PSU's cases to make mine which allowed me to use standard PC power cords.
This is a pretty useful DIY link, I may have to look into making one of these. I certainly want to make a softbox.