To follow this tutorial you must have downloaded A Maze Kit for Unity3D. We advise you to follow the first tutorial also if you don't know yet this plugin.
Sample scene
A sample of a game produced with the CubeShooter theme is available from its root. Open the scene named game in the CubeShooter folder :
EquilibreGames/AMazeKit/CubeShooter/game
Select the theme
For now, we'll start from a blank scene. Create a Maze object, then set the theme as CubeShooter (no space, use capital letters when needed, depending on your system) in the maze inspector, once selected.
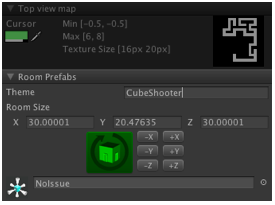
Once you've done that, draw, generate a maze and click on the Instantiate prefabs button.
Add the player
A player prefab has been included in the package, here's the path, inside the maze kit folder :
Drag and drop the player prefab inside a room, once the maze has been instantiate.
Hint : there should be an empty room (one and only one) where you can safely locate the player without being harmed as soon as the game starts.
Hint : dragging the prefab inside an instantiated room ensures the it's put on a room floor. Otherwise, the prefab can be instantiated anywhere in the 3D world. If you've created the prefab elsewhere, just move its transform so it is located in a room of the maze.
Camera settings
Move your main camera above the previous prefab, and rotates it until you see the blue cube (the player) in the middle of it.
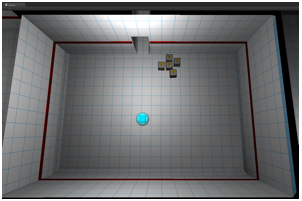
The Player script automatically searches for the camera tagged MainCamera at the beginning of a play session, so you just have to locate it right before you hit the "Play" button.
Play !
That's right, it's already playable: hit the "Play" button : you're in !
Keys :
- up/left/down/right (or ZQSD or WASD) to move the player
- mouse to change shooting direction
- mouse left click to shoot
Try to eliminate all monsters and reach level 5 !
For more challenge, put the ReplayGui on a GameObject (MainCamera or a new empty GameObject for instance), this allows to regenerate three types of mazes at runtime : easy, medium and hard (this changes the size of the maze).
Evolution
This theme include a XP progression for the player and the monsters. By default, they have 5 levels each as the monster takes the same level as the player when it sees the player.
Feel free to experiment with those parameters, the more levels you have, the more fun you'll have also with constantly changing challenges and weapons.
For the player, it's a basic model, each level has the following parameters :
- shield : yes or no
- bullet delay : minimum delay between each bullet shot
- bullet speed : well.. you know how to read
- health : the maximum health for the player (set when he reaches that level)
- xpNeeded : how much does he need to gain to reach the next level
- speed : does he walk, run or fly ?
The monsters includes more parameters as they have a configurable AI, each level has the following parameters :
- bullet : does he shoot or not ?
- bullet delay and speed : as the player parameters
- health, speed are understandable
- xpGain : when killed, the XP the player gets
- directionChangeDelay : control the AI style: does he turns often to follow the player or does he changes his mind less often ?
- nearMagnitude: detection radius of the player: set low for a blind monster, set high for an omniscient one
- repulsedTime : when he touches the player, he's repulsed and goes away.. for how long ?
- fightBack: if the player shoots him, does he fight back immediately, even if the player is not in its nearMagnitude radius ?
- sideWalk : does he do sidewalk sometimes to avoid the player bullets ?
- sideSpeed, sideSpeedChangeDelay : used by sidewalk
- skin : the specific Material used for this level so the player can tell which monster he's got in front of him.
Now you've got all the keys to make you procedurally generated roguelike !
Next tutorial will focus on the creation of a 2D stealth game.