The first of maybe many Torque Tutorials - Torqials - to help Torque developers get on the right track.
This helps 3Ds max users add multiple collision boxes to a single DTS model for Torque Game Engine Advanced. (But should work with Torque 3D and Torque Game Engine classic.)
I'm writing this tutorial because I could not find the answer, and after much experimenting, finally got the system to work and decided to write my own tutorial.
This tutorial will assume you know the basics of 3Ds max (I'm using 3Ds max 10) and have the DTS exporter already installed. (If not, suggest I write a tutorial on how to install it!)
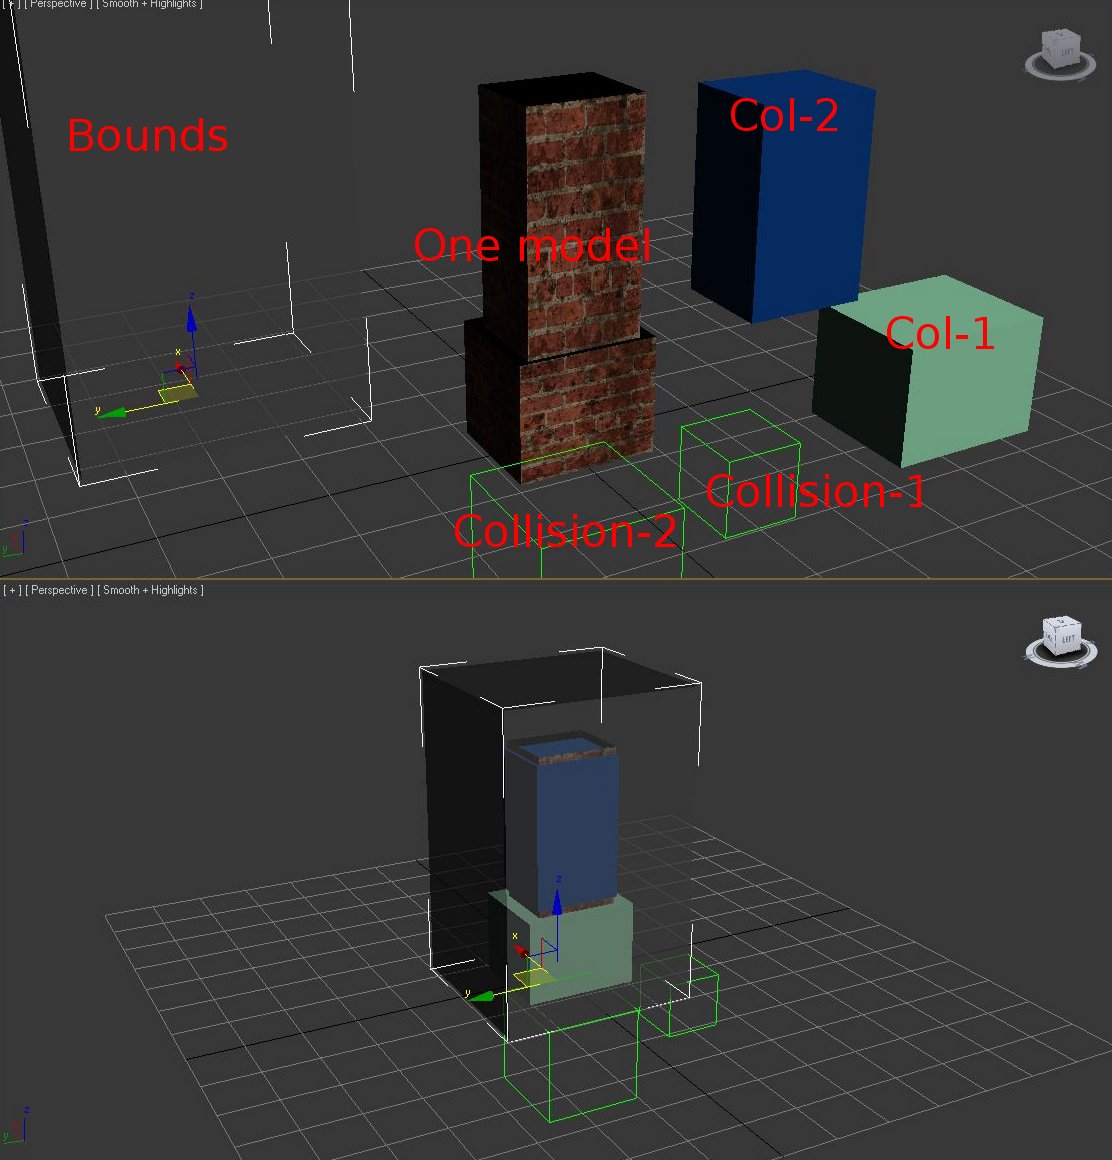
1. First off, start with basic one-piece prop model to try.
2. Add your first collision box, which is literally a box. You can make it whatever shape you like except anything that is CONCAVE. (Something like an open laptop would require two blocks, and not a bent single block.) Name that block "col-1" without the quotes.
3. Repeat new blocks naming them a number higher than the previous. So "col-2" without the quotes is the next collision box.
4. For every collision box you add, make a dummy helper named "collision-X", without the quotes and the X being the corresponding number.
5. Don't forget to add the 'bounds'. If you don't know what that is, it is just a simple block with the name "bounds" (Without quotes). This goes around the prop model when finished.
Confusing? Its ok, I made a picture:
(Top being the pieces separate, bottom being a more completed model.)
Now the hierarchy set-up. This is a very crucial set-up, and must be done perfectly. Its ok, I got a picture for it too.
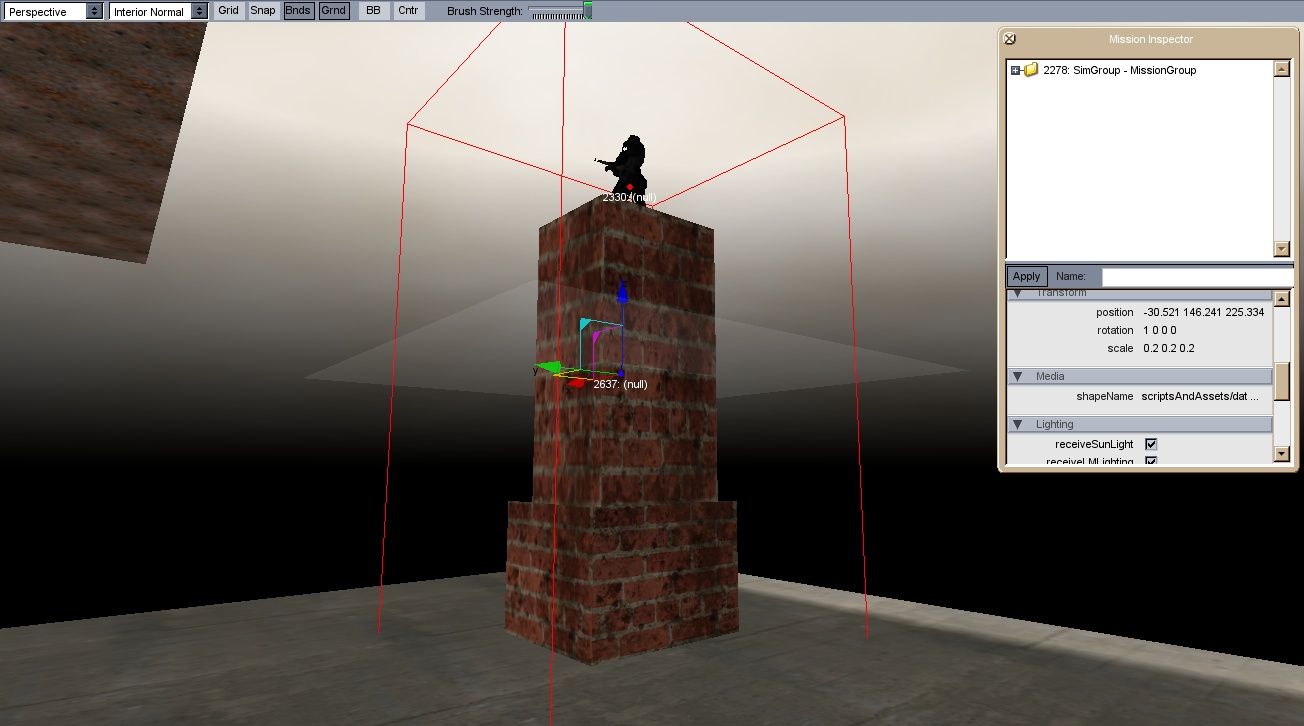
First click the model and set-up the basics in the DTS exporter tool (Embed Shape).
Open up 'Schematic View', which has a block with an arrow that points to another block. (A tool I couldn't find for a long time.)
You'll connect col-1, col-2, ect to start01. If you forget, the colors match. The bluish purple blocks connect to the same green one the model is attached to. (In my case chimney2.)
Connect collision-1 and collision-2, and any others to base01.
Here is an example picture of my set-up:

This is not covering the specifics of details. So right now we can export this simple right to the game!
Please don't mind how ugly this next picture is! (All test items!)
Thanks for reading!


so complex for me, it is c++?
Looking at the sheer lack of source code of ANY kind I'd say no.
Judging by the category it was posted under I'd say this is a tutorial for using the advanced features of the Torque game engine.
Yes - No C++ code involved!
I did list this as an intermediate tutorial since it requires some knowledge of 3Ds max, the DTS exporter, and a little of Torque itself.
that's why my studio and I are using Unity. Very good tutorial and post.
Torque isn't bad, but I do feel its poorly documented for some very specific things.
I'll write plenty more tutorials for the more complex things later.
ninjadave are you majindave from zeq2lite ? also is there any one a coder and a dbz fan if u think what it taked to join Moddb.com clik it